
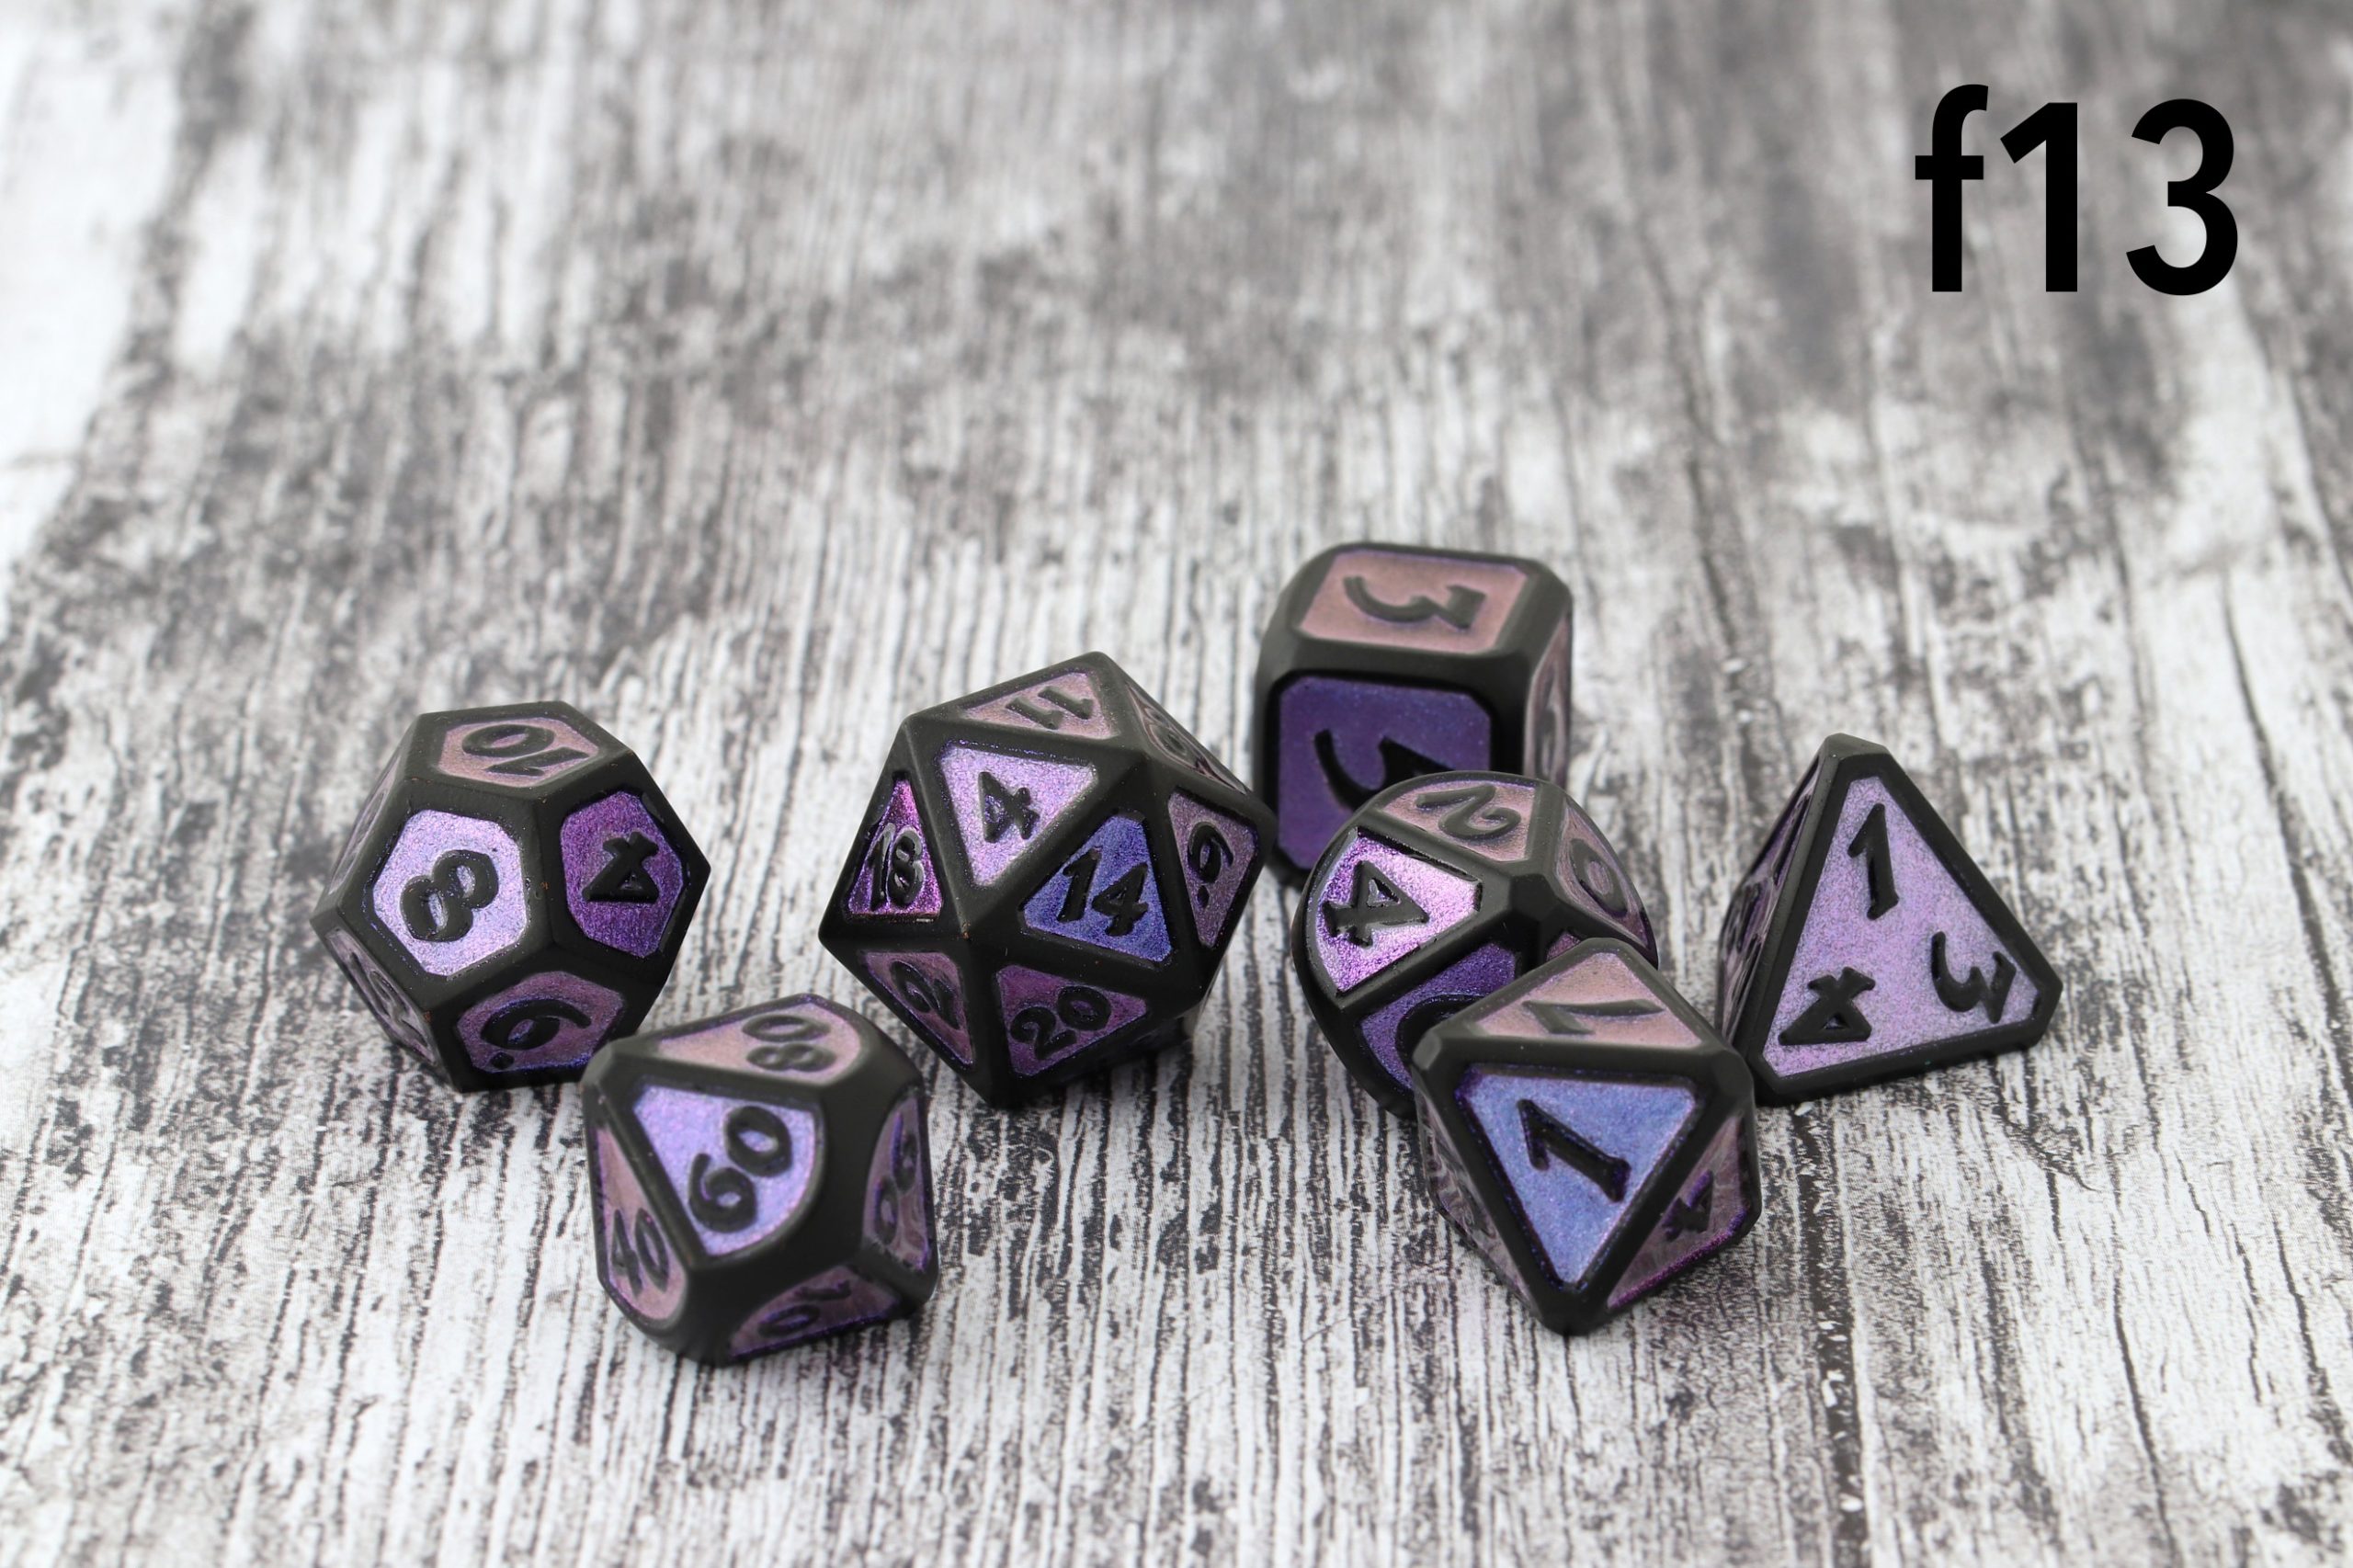
Making magic happen
Have you ever seen someone else’s wonderful photos of their dice where they look stunning, glamorous or just plain beautiful, and wondered how you can make your own photos look just as great? Maybe you have all these fabulous dice, and want to know the magic formula to make that brilliance translate in your photos.

Here’s the bad news: There is no easy, one-click-fixes-all magic formula. The good news, however, is that you can definitely make photo magic happen if you know how to get the most out of the equipment you have.
It’s important that you manage your expectations. It’s unlikely that you get the same level of quality with an average smartphone camera and dim indoor lighting as someone using professional DSLR equipment with remote flashes and a light tent. But don’t let that stop you. Your smartphone or compact camera can still take great photos of dice, and I will hopefully be able to teach you a few new tricks how to use what you have to your advantage.
Some photography basics
The easiest way to take photos is to put your camera in full automatic mode and just point and click, and then hope that the result turns out all right. In a lot of cases, it does. Maybe in some cases you even end up with a stunning shot here and there. However, to consistently get good results, it helps if you know the basics of photography and how aperture, shutter speed and ISO work together (in this case, ISO does not stand for ‘in-search-of’ but for film or sensor sensitivity). Obviously, a dice blog is not the right place to teach you the basics of photography, but I can try to give you a very quick n’ dirty introduction.
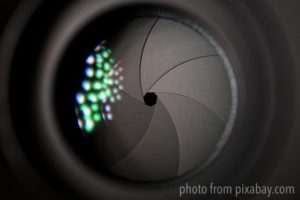
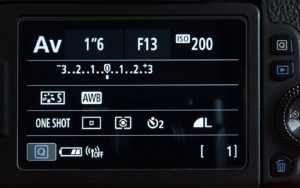
Aperture is the measure of how widely open your lens is when the photo is being taken, and thus how much light is being captured by the sensor. The lower the value, the wider open the aperture, the more light shines through the lens. The wider open the aperture, the smaller the range of sharpness in your picture. You can take a look at the cheat card further down that may help you understand this better. Aperture values are usually between f1.4 and f22. The camera settings for aperture are called A or Av on most camera models.
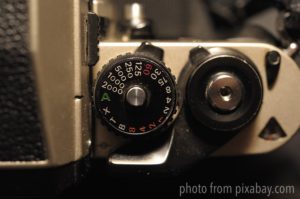
Shutter speed (or exposure time) is how long the lens is open while you take your picture. The longer it is open, the more light is being captured by the sensor. The lower the number, the shorter the time is, the less light shines through. The longer the time, the more likely it is that your photo becomes blurry (unless it is mounted on a tripod or otherwise in a fixed position). Shutter speeds are usually between 30 seconds (extremely long) and 1/4000 of a second (extremely short). The camera settings for shutter speed are called T or Tv, or S or Sv on most camera models.
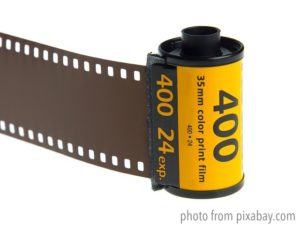
ISO is a value that indicates how sensitive the sensor is to light (in the olden days, this was a fixed value tied to the film, which meant you couldn’t change this setting between photos). The higher the ISO value, the more light sensitivity, the brighter (and grainier) your picture.
These three settings are interconnected, and in order to get a well-lit photo (not over or underexposed), the right combination of these three settings needs to be applied. If you expose your photo for too long, it becomes overexposed and becomes too light. If you expose it for too short, it becomes underexposed and too dark. If you let too much light in with a wide aperture, you’ll get a too light photo, if not enough light, then underexposed. If your ISO is too low, you get a dark picture, etc.
The German photo blog Hamburger Fotospots has a great cheat card that may help you check at a glance how your result may change when you modify your aperture, shutter speed and ISO settings.
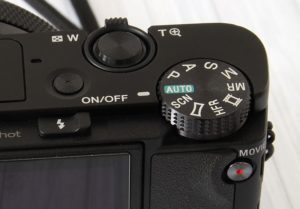
Normally, when you put your camera into full automatic mode, the camera decides which combination of settings to use to get the picture that the camera thinks you want. However, the camera doesn’t always know what effect you want, or where exactly you want your focus point to be, or if you want a wider or a shorter focus range in your picture.
This is why I would always recommend, if possible, that you use the so-called semi-automatic settings, where you either manually decide which shutter speed or which aperture to use, and the camera then calculates the matching aperture or shutter speed respectively to produce a well-lit photo.
Generally, the rule is: The less light you have in your environment, the wider open the aperture, the longer the shutter speed, and the higher the ISO you need to use. However, a wide aperture means you get a smaller focus range. A long shutter speed means you need to hold the camera very still to avoid motion blur. A high ISO means your picture will be grainier. The solution then is to either accept a short focus range or grainy photo, use a tripod or other ways to immobilize the camera, or use an artificial light source like lights or flash(es).
Equipment

What equipment is recommended for dice photography? That’s a difficult question to answer as well, so my answer is: It depends. You certainly don’t need to invest several hundred to thousand dollars in professional equipment to get good results. If you already have a standalone camera, or even just a smartphone, you can get to the point of taking really good dice pictures if you’re willing to invest in just a little extra equipment.
Generally recommended for good indoor dice shots are:
- A light tent or light box
- A tripod
- An external light source
None of these need to be professional grade. You can buy all this for under $70. If you’re very crafty, you may even be able to build your own light box. There are different kinds of light tents and light boxes out there, and for dice it doesn’t really matter which format or type you choose.
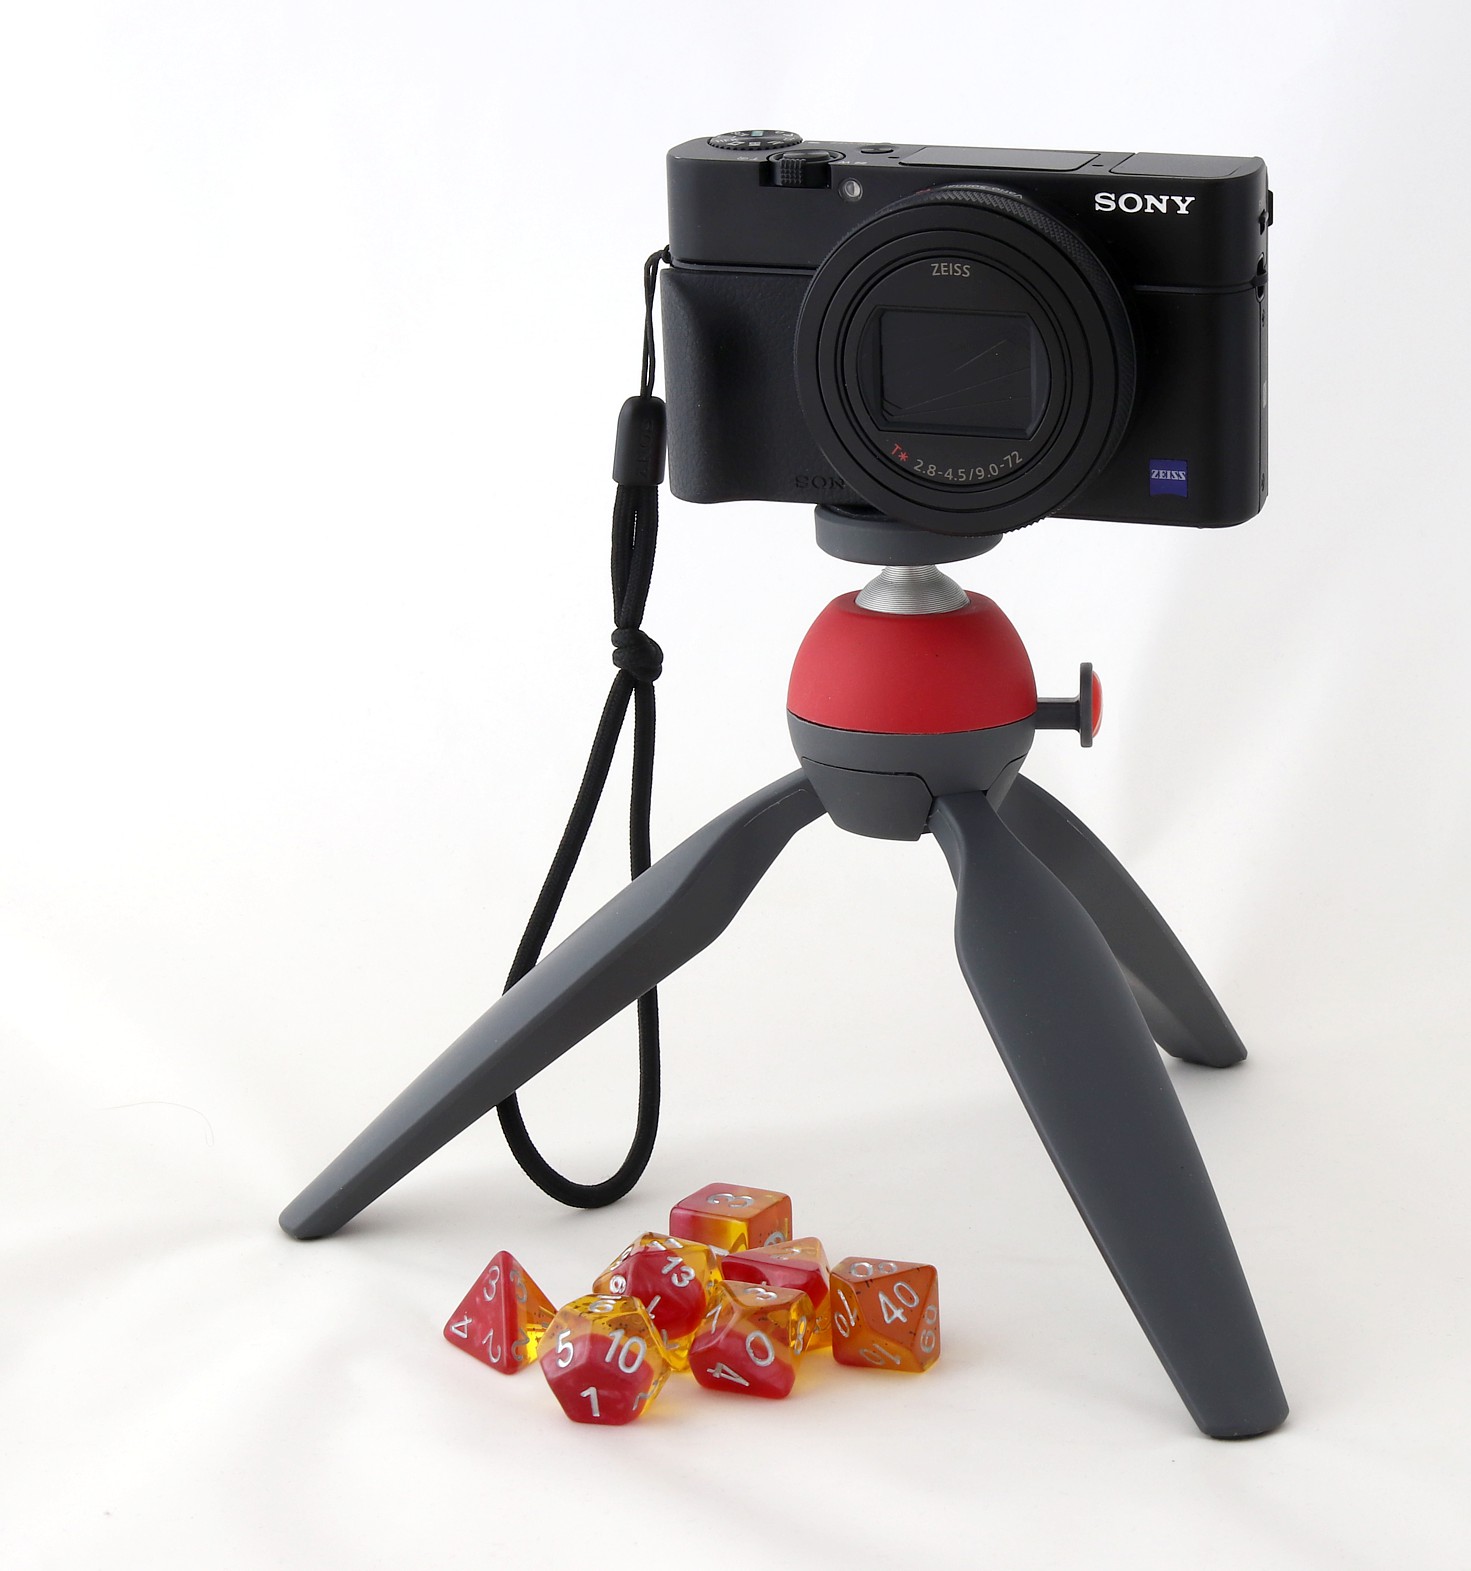
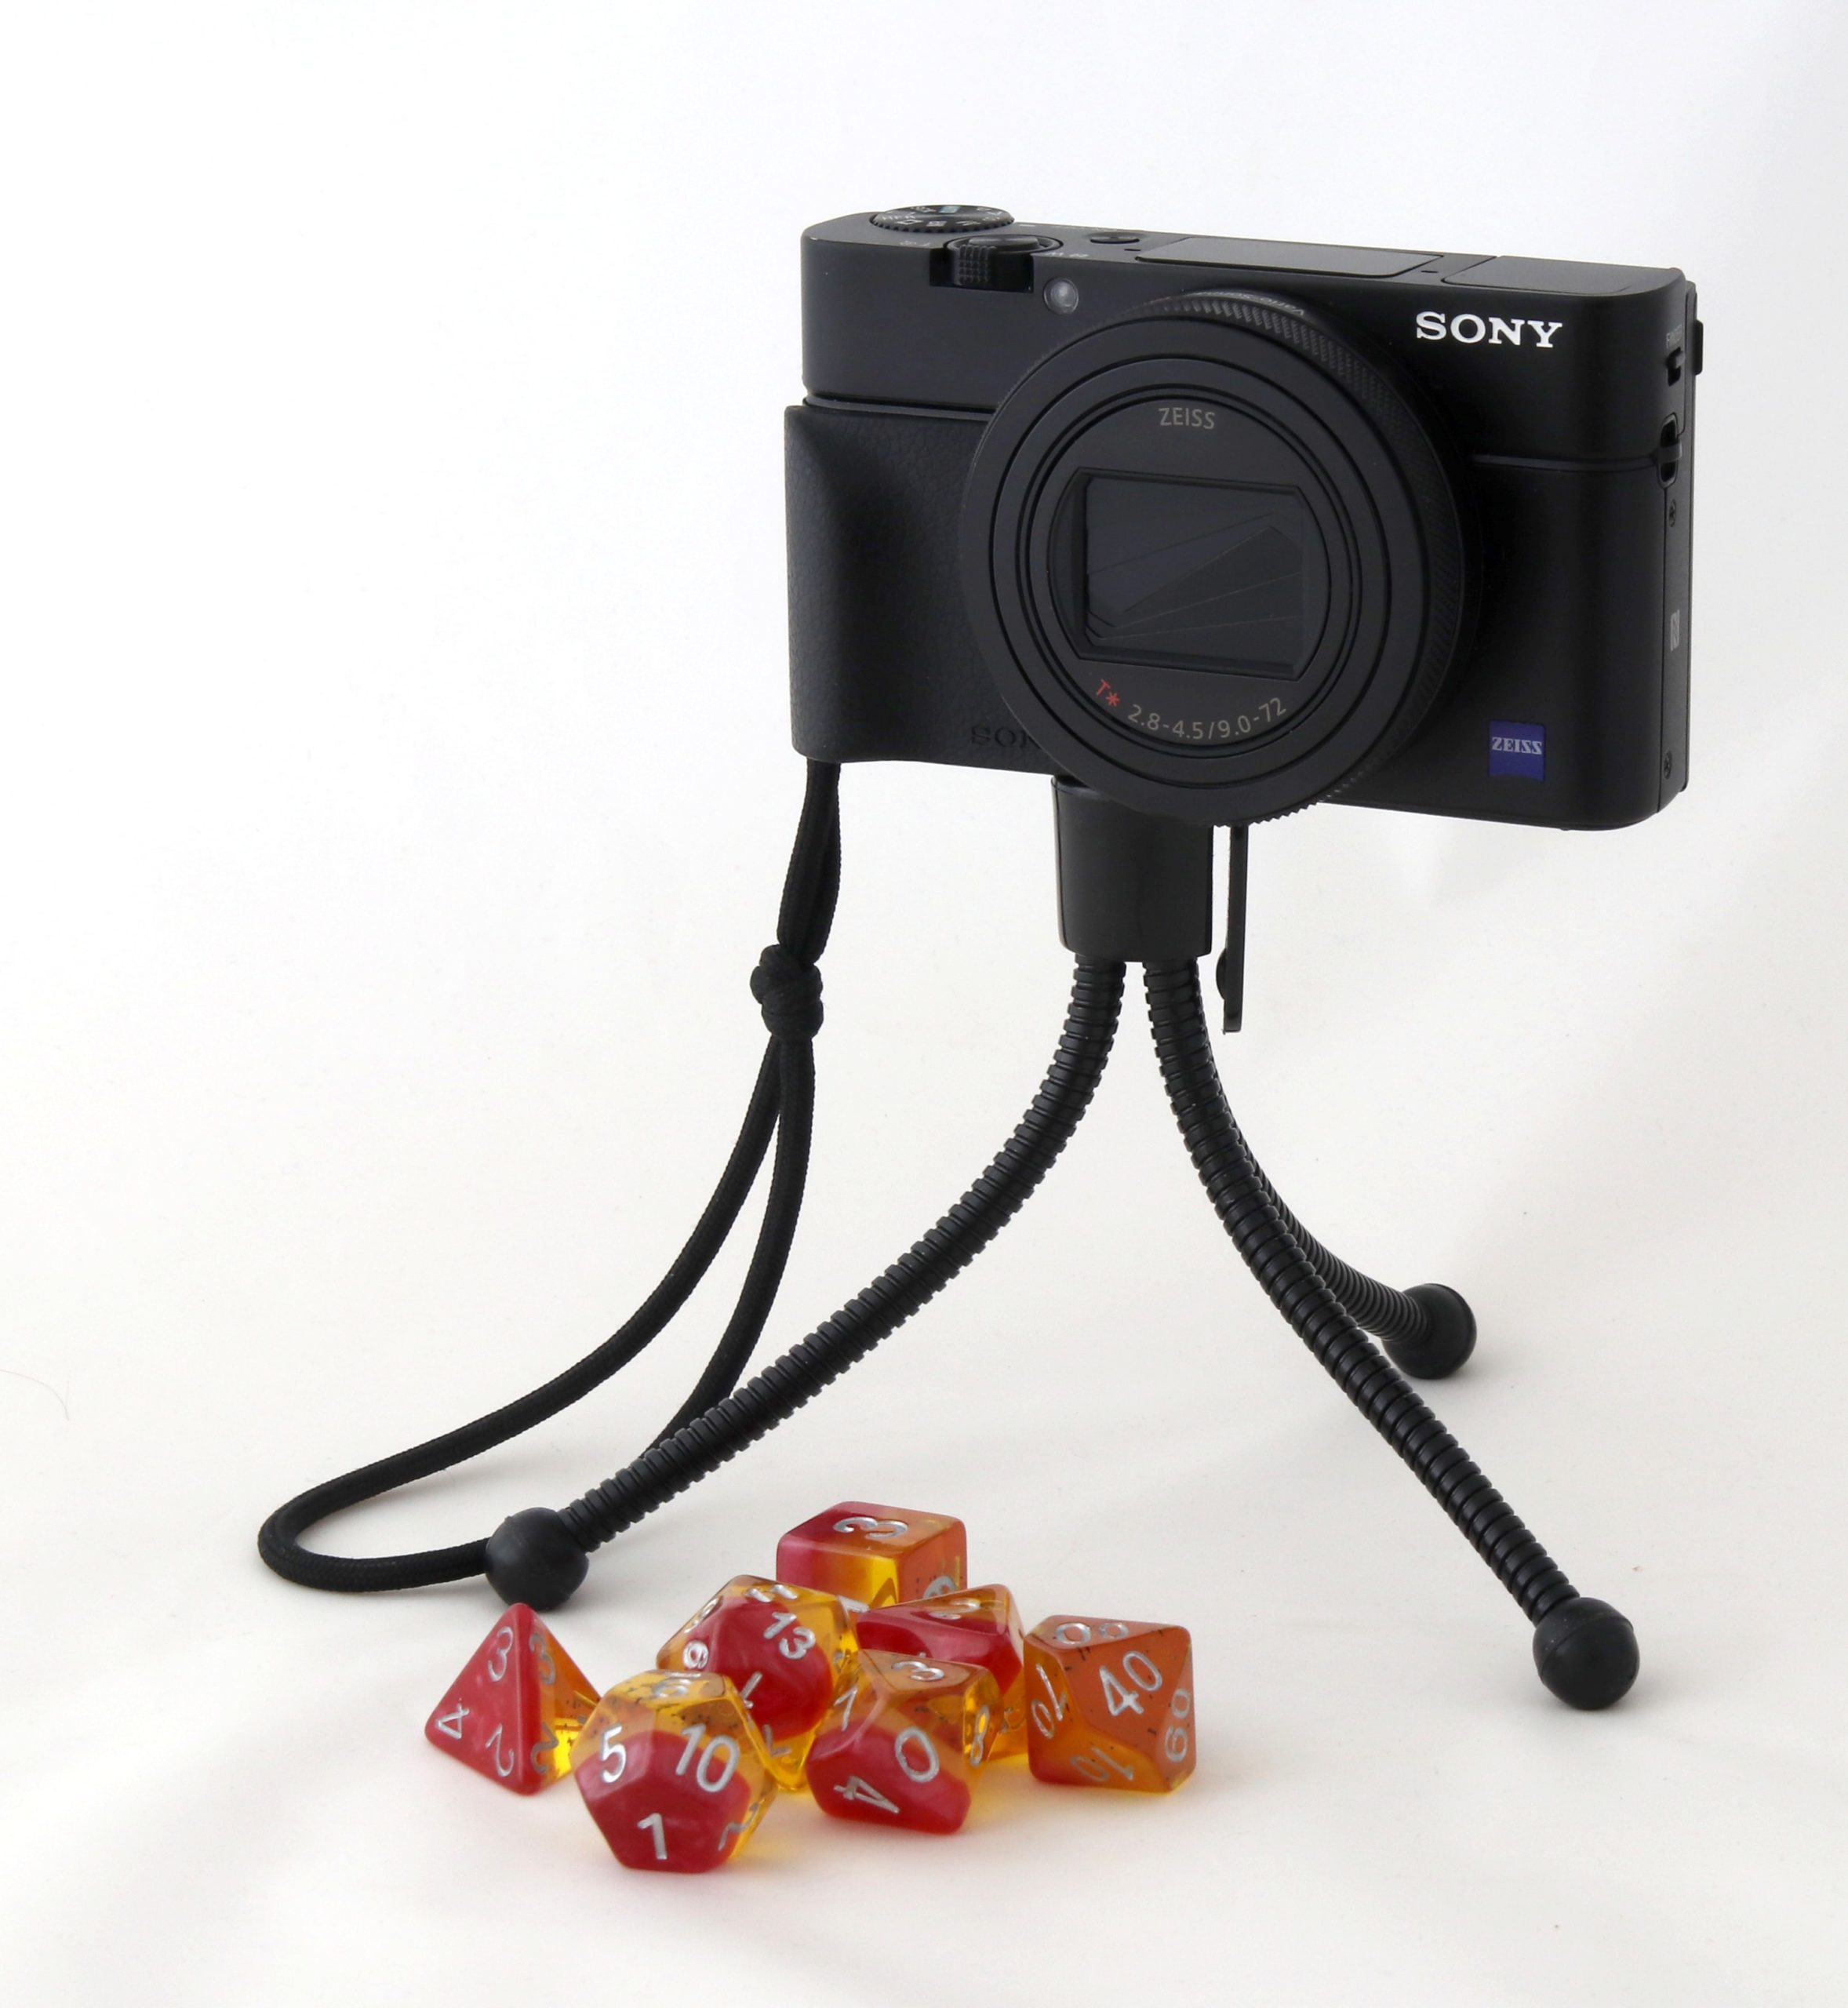
In terms of tripods, if you have a smartphone or a compact camera, it will suffice if you get one of those small portable table tripods, either with rigid or with flexible legs. If you have a larger camera, like a mirrorless or an SLR camera, it is recommended you get a sturdier tripod, like GorillaPod or a taller tripod with extendable legs. For smartphones, a specially designed clamp is recommended.
If you’re looking to buy a larger tripod, it might make sense to pay attention the different types of tripod heads and plates. Some tripods have proprietary plate systems you can only use with that one particular tripod. Others have systems like Arca Swiss that are widely used and can be used with a number of different tripods and tripod heads. If weight and portability are important for you, carbon fiber is the most lightweight material, but also the most expensive.
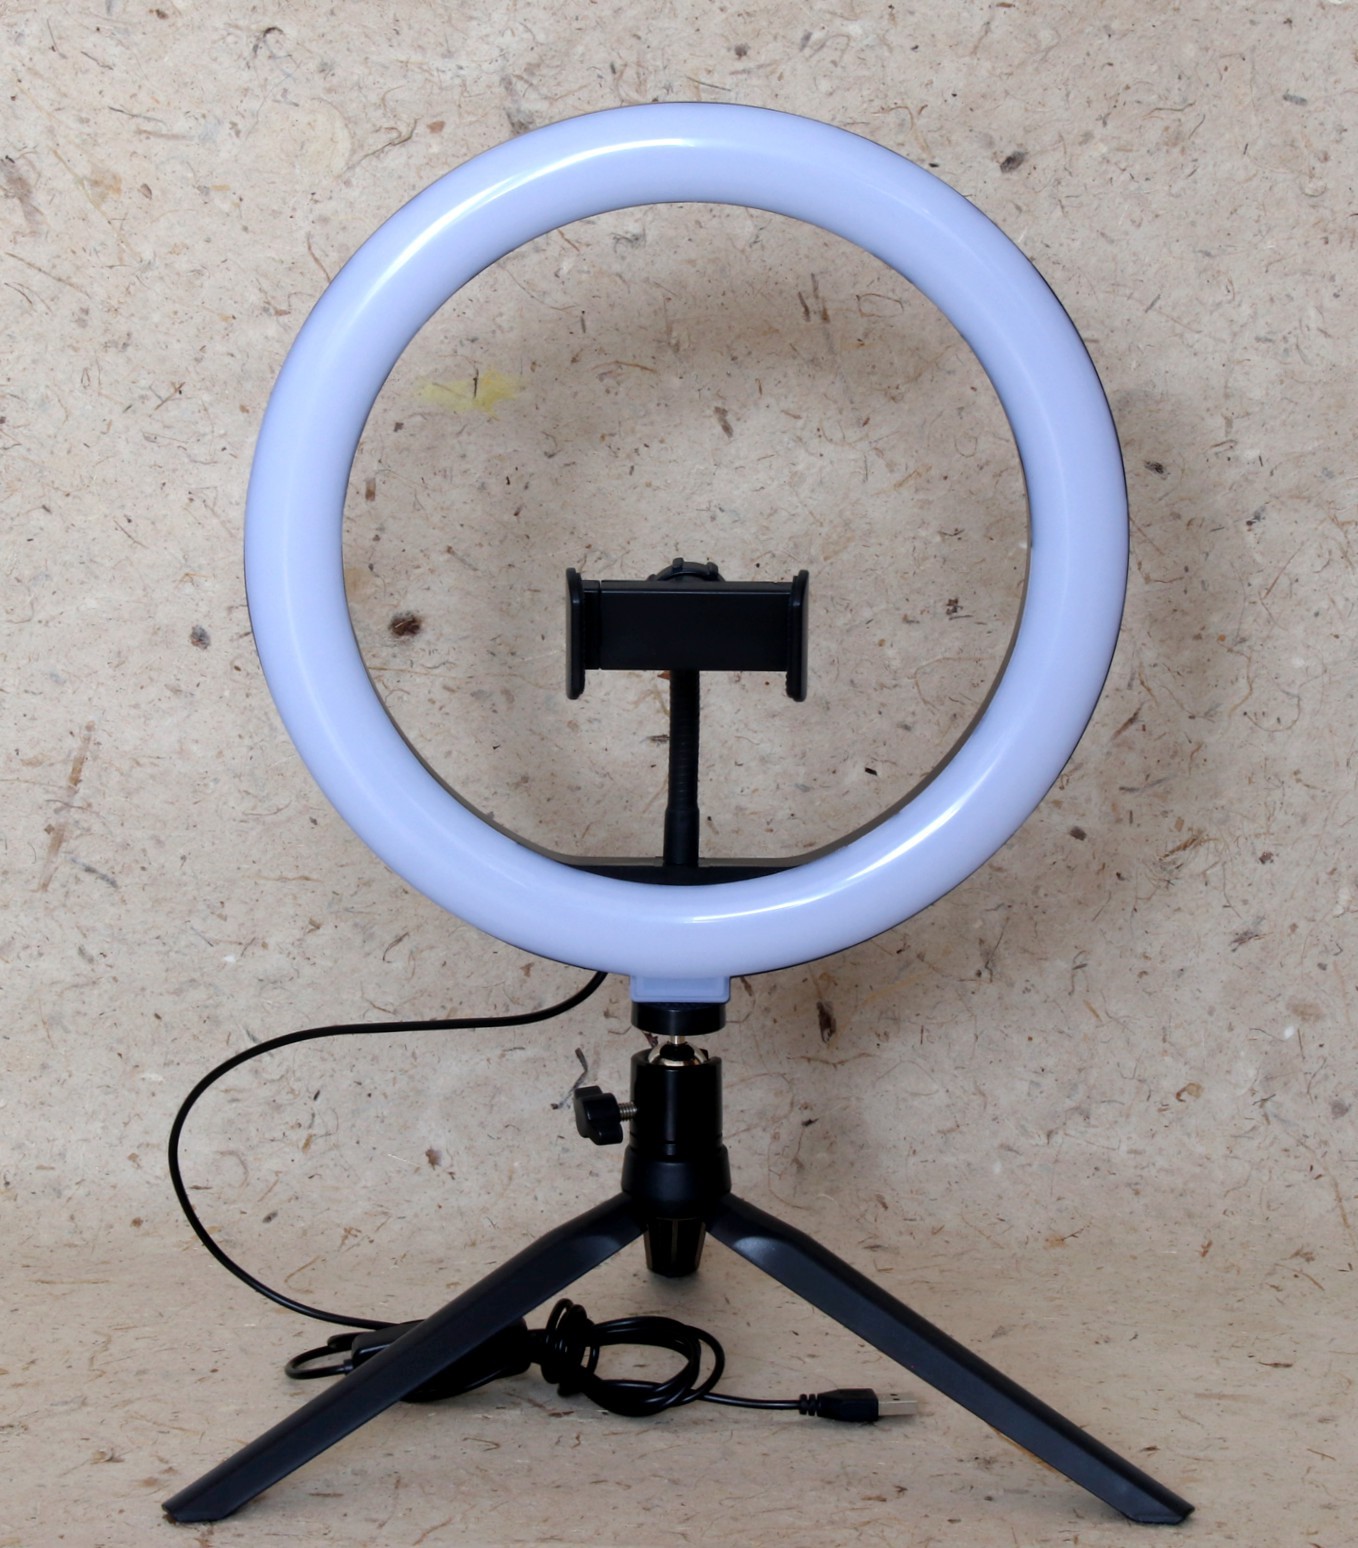
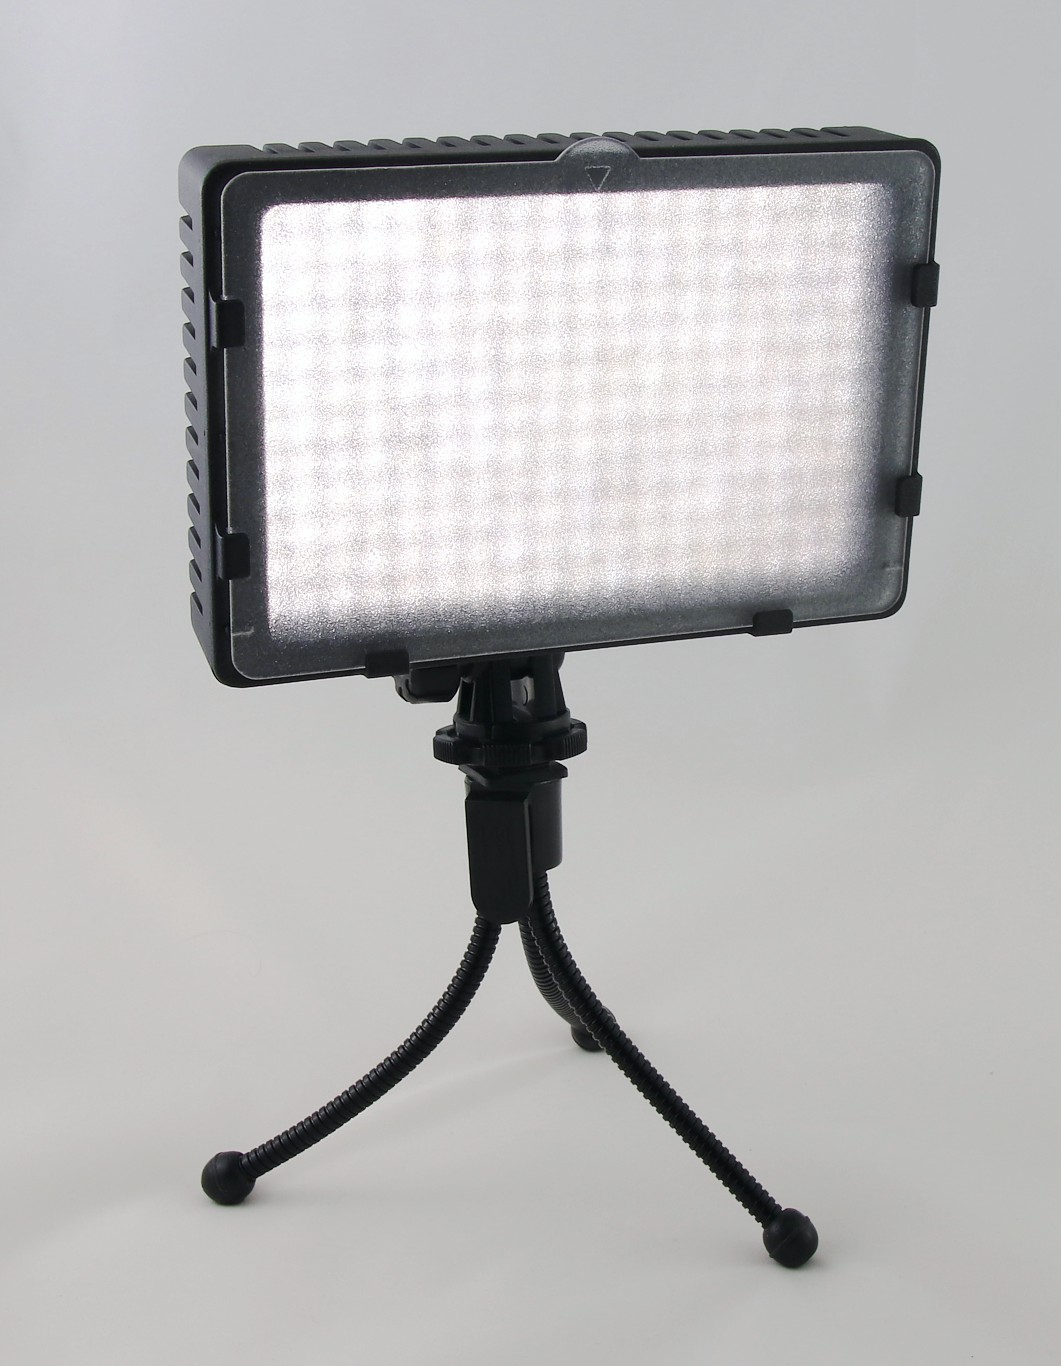
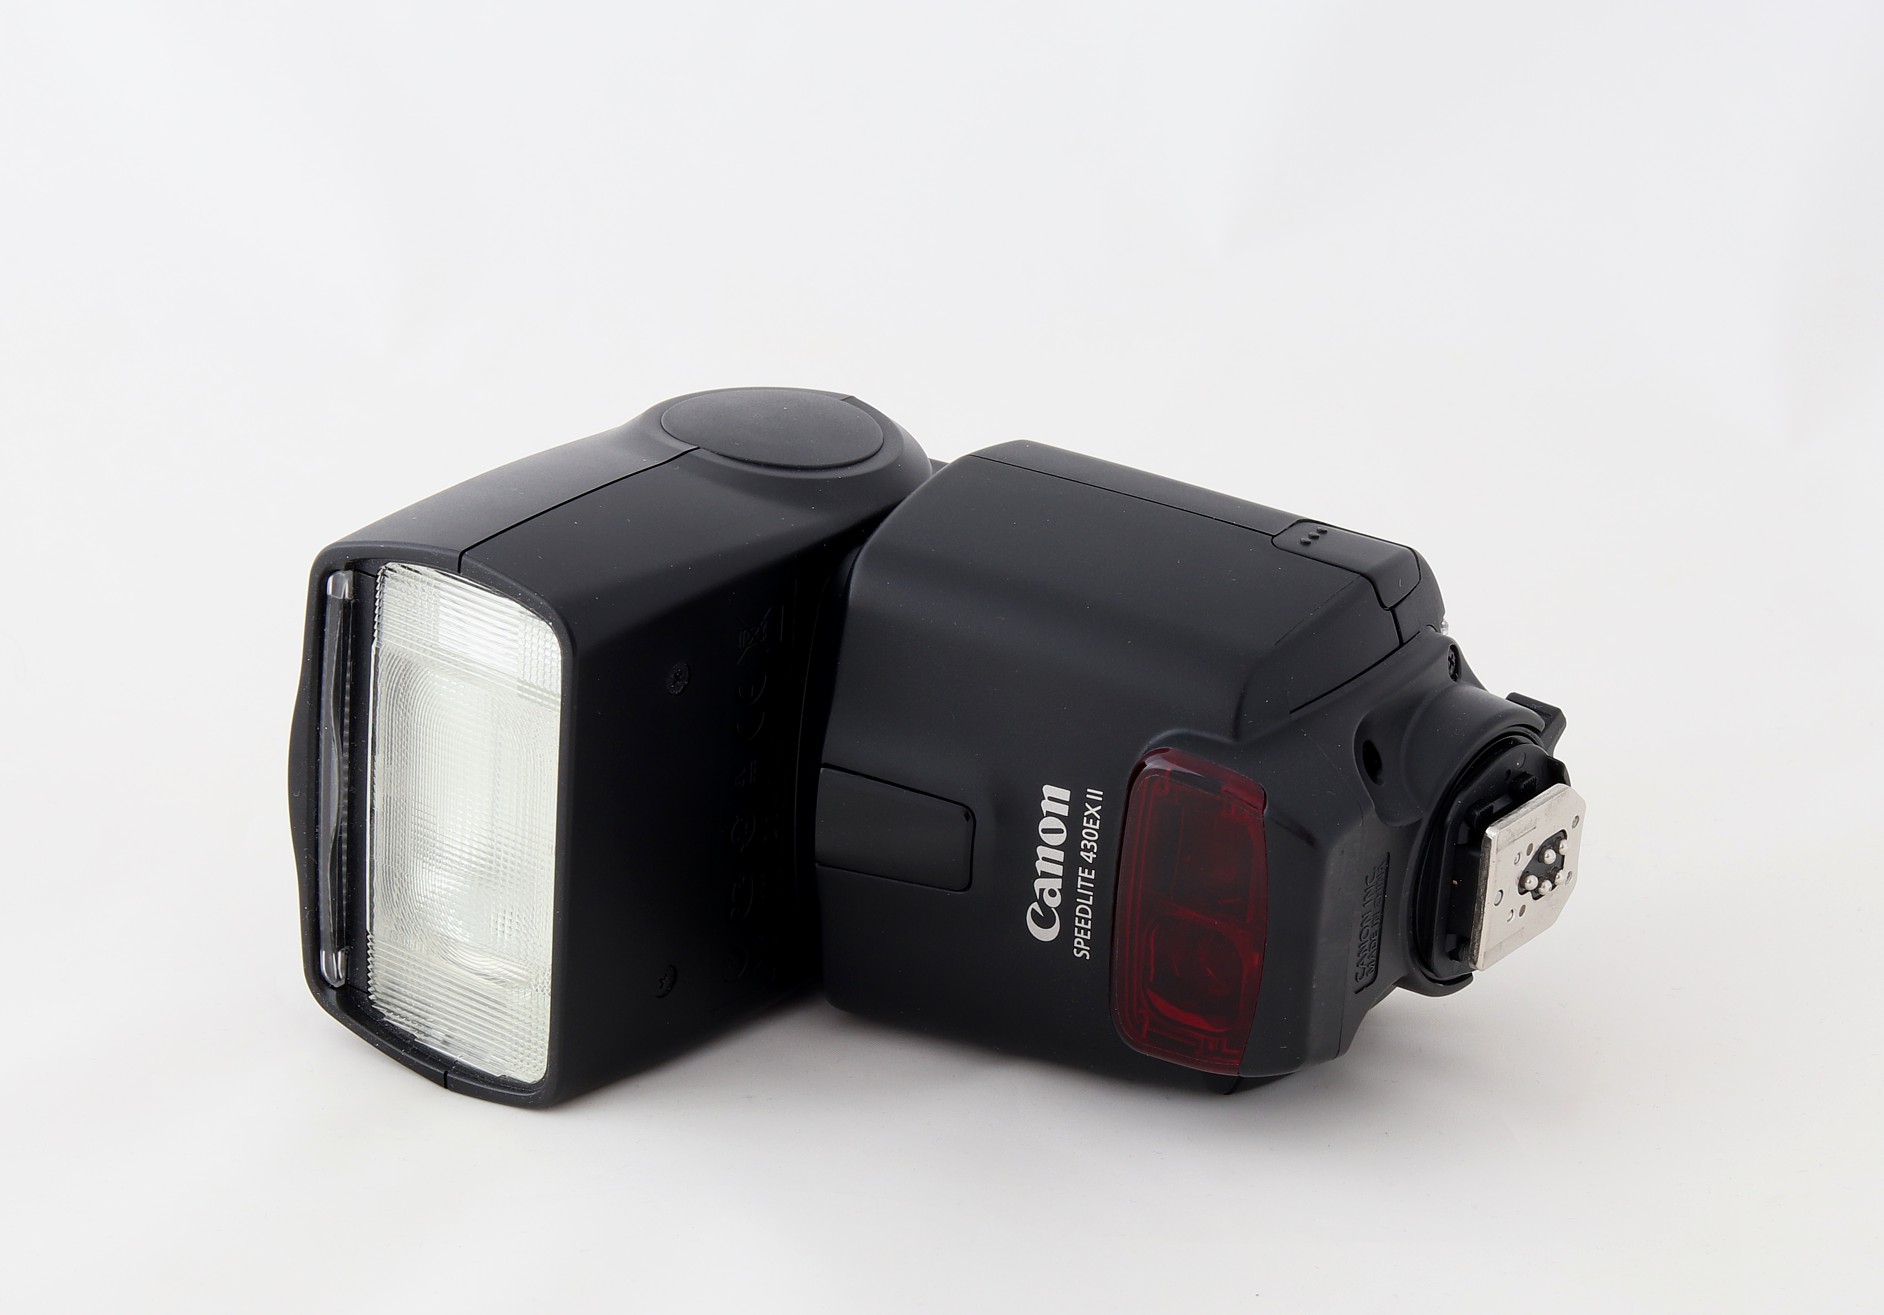
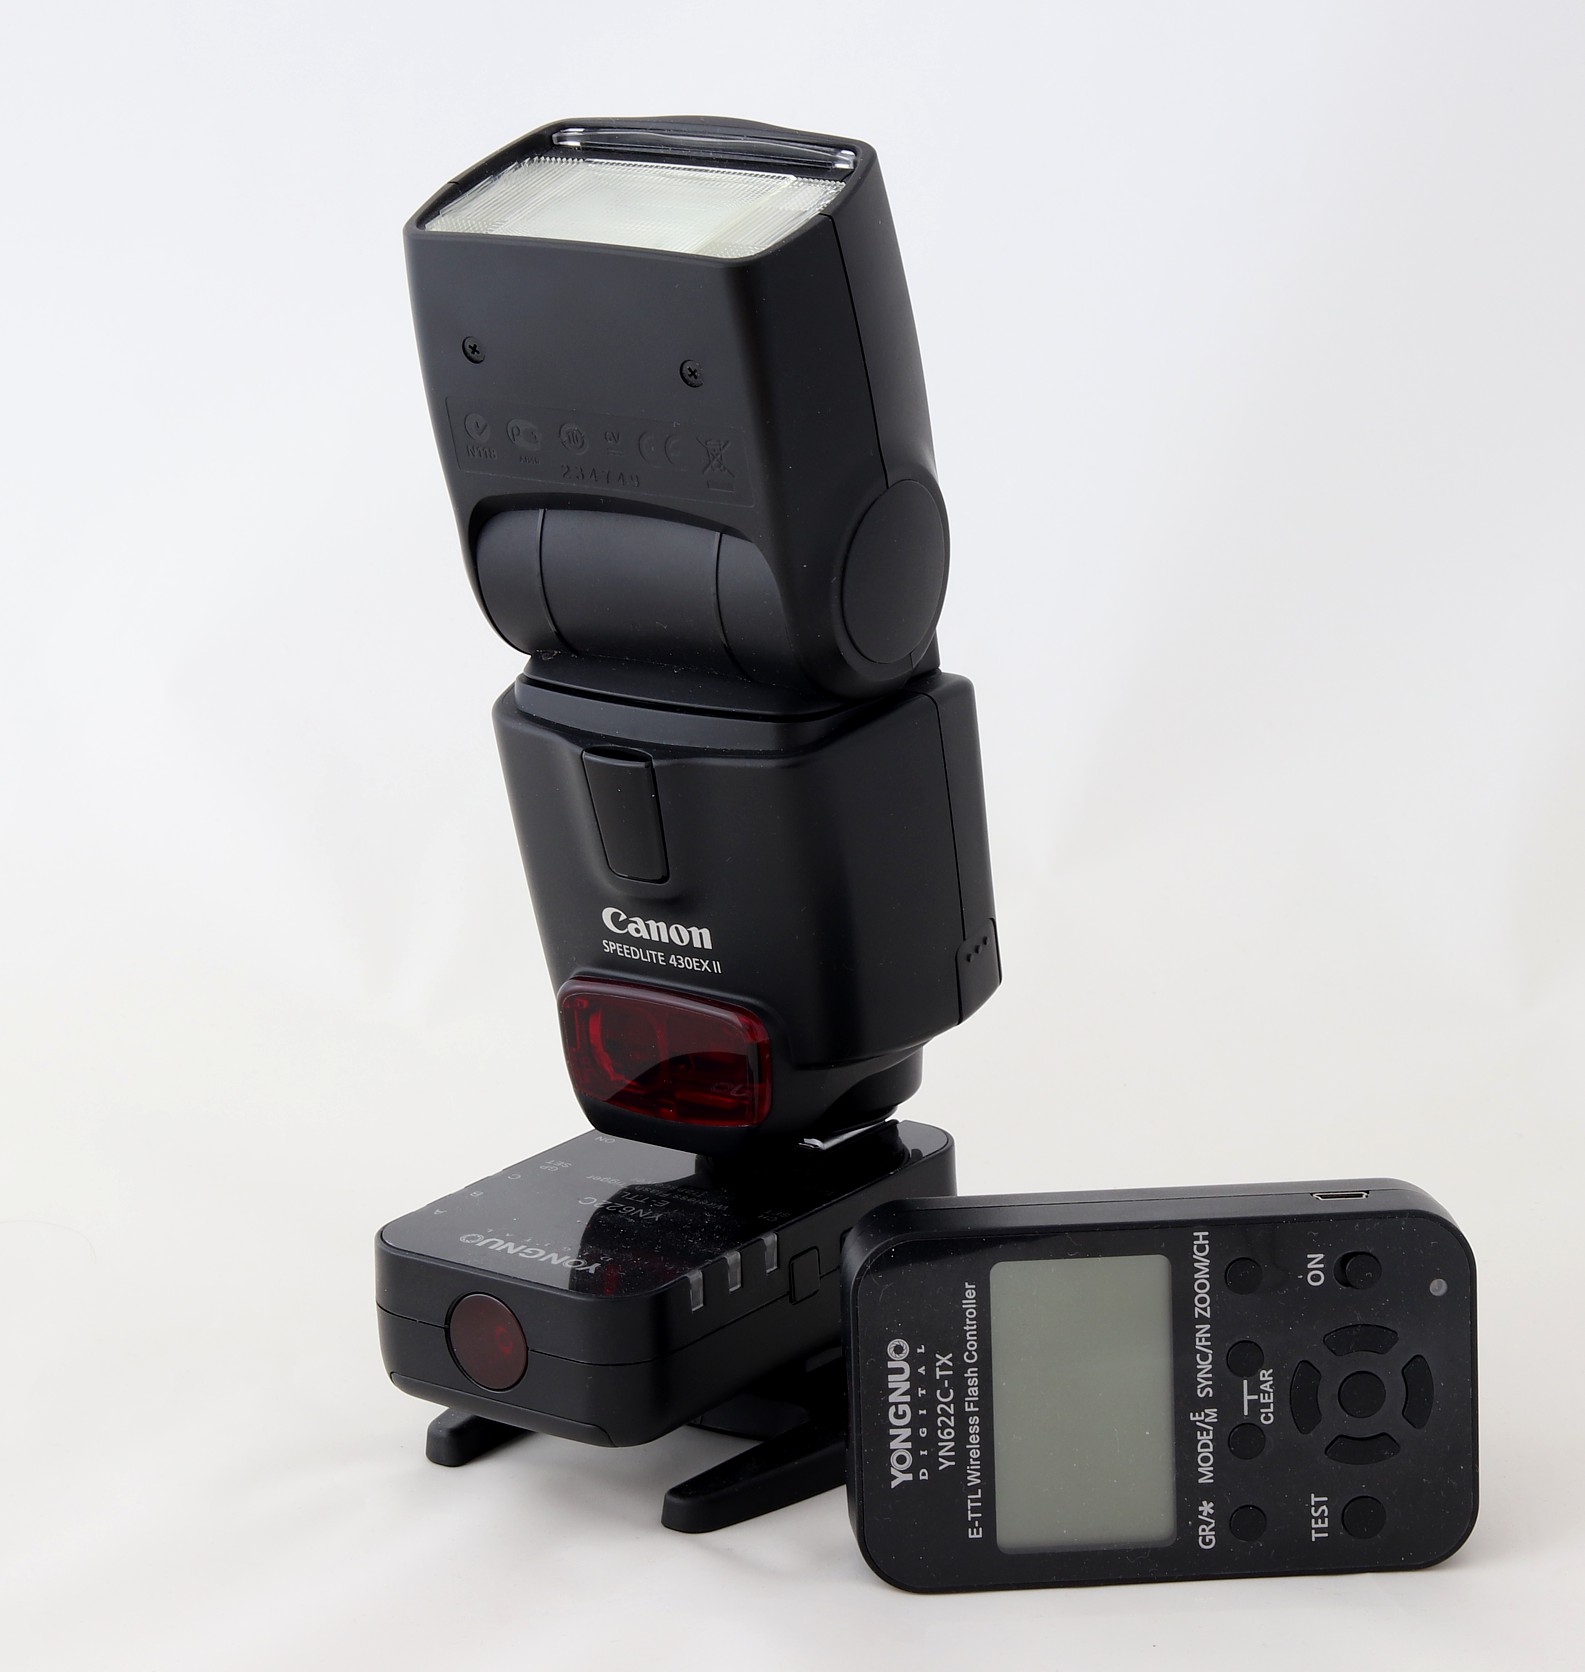
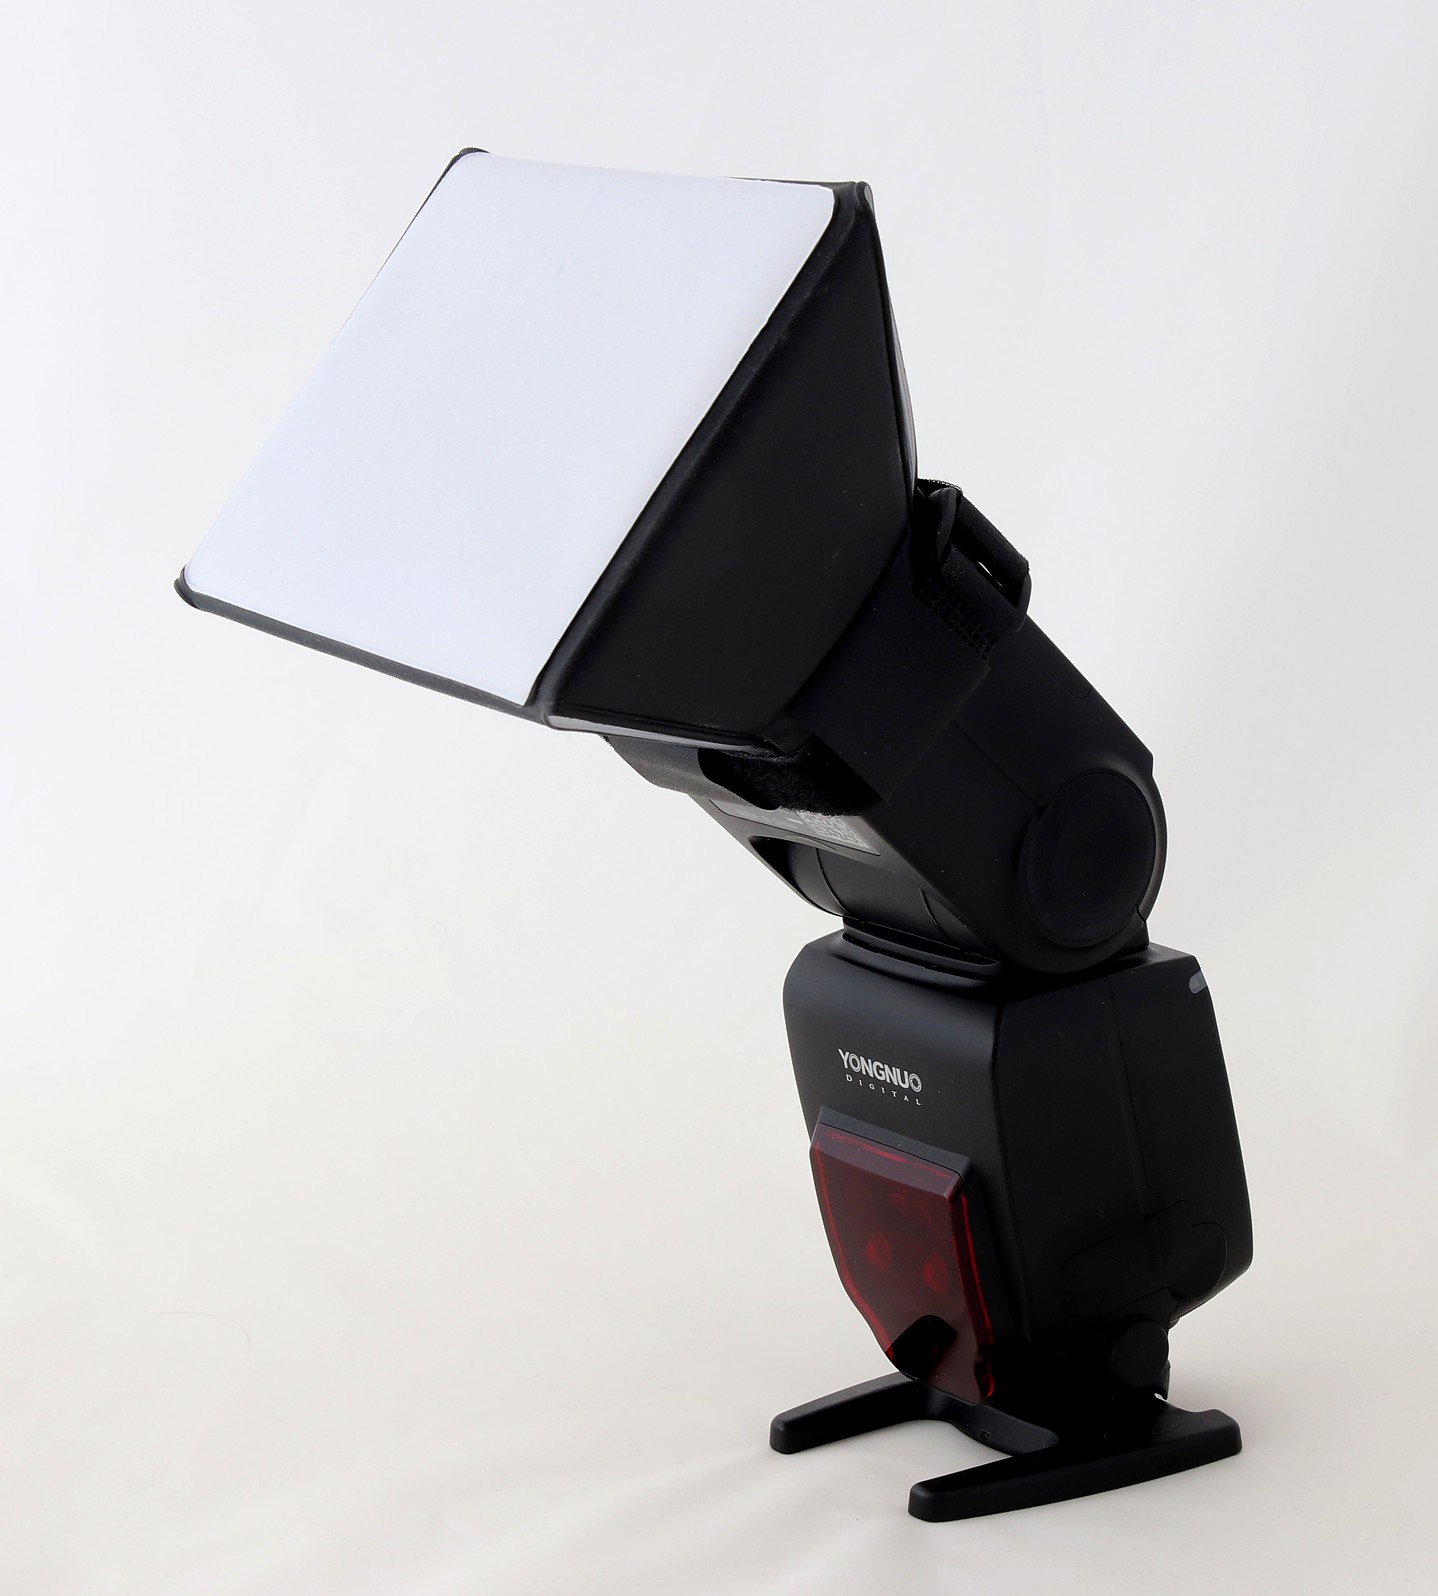
External light sources can be a variety of things. It can be a classic flash (like an external shoe mount flash if your camera has a flash shoe), or a light of some kind. Built-in camera flashes also work, but for dice photography it is not always useful to have a harsh, head-on lighting situation going on. What you ideally want is diffuse light coming from either above or from two sides (left and right) to have your dice illuminated evenly. This can be achieved by buying external lights you can set up where you need them to, but LED light bars or ring lights can also be an alternative. If you want to invest a little more money, you could look into buying two external flashes with remote controller/transceiver, but this only really makes sense if you also plan to use them for other purposes as well, as you’ll be above the $200 mark for these.
The Setup
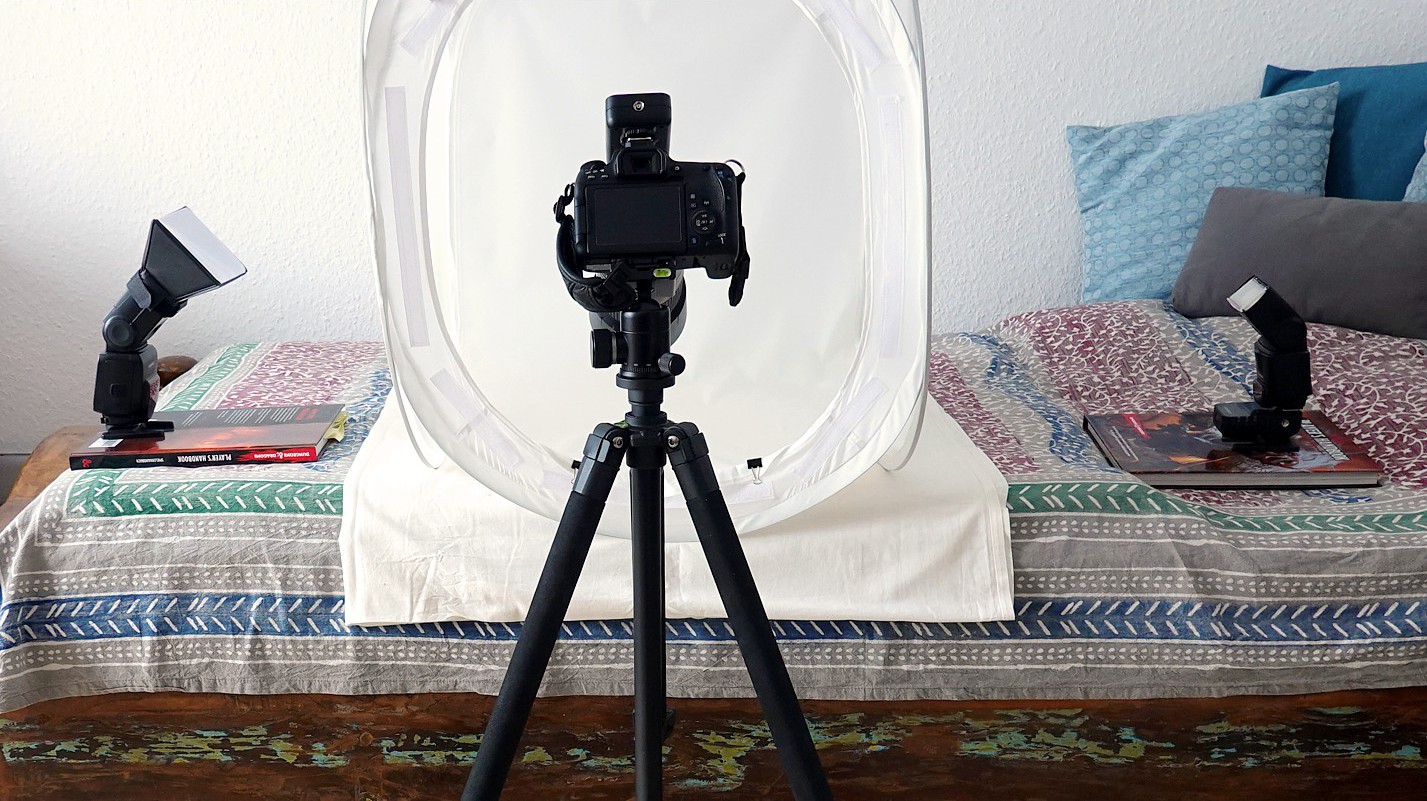
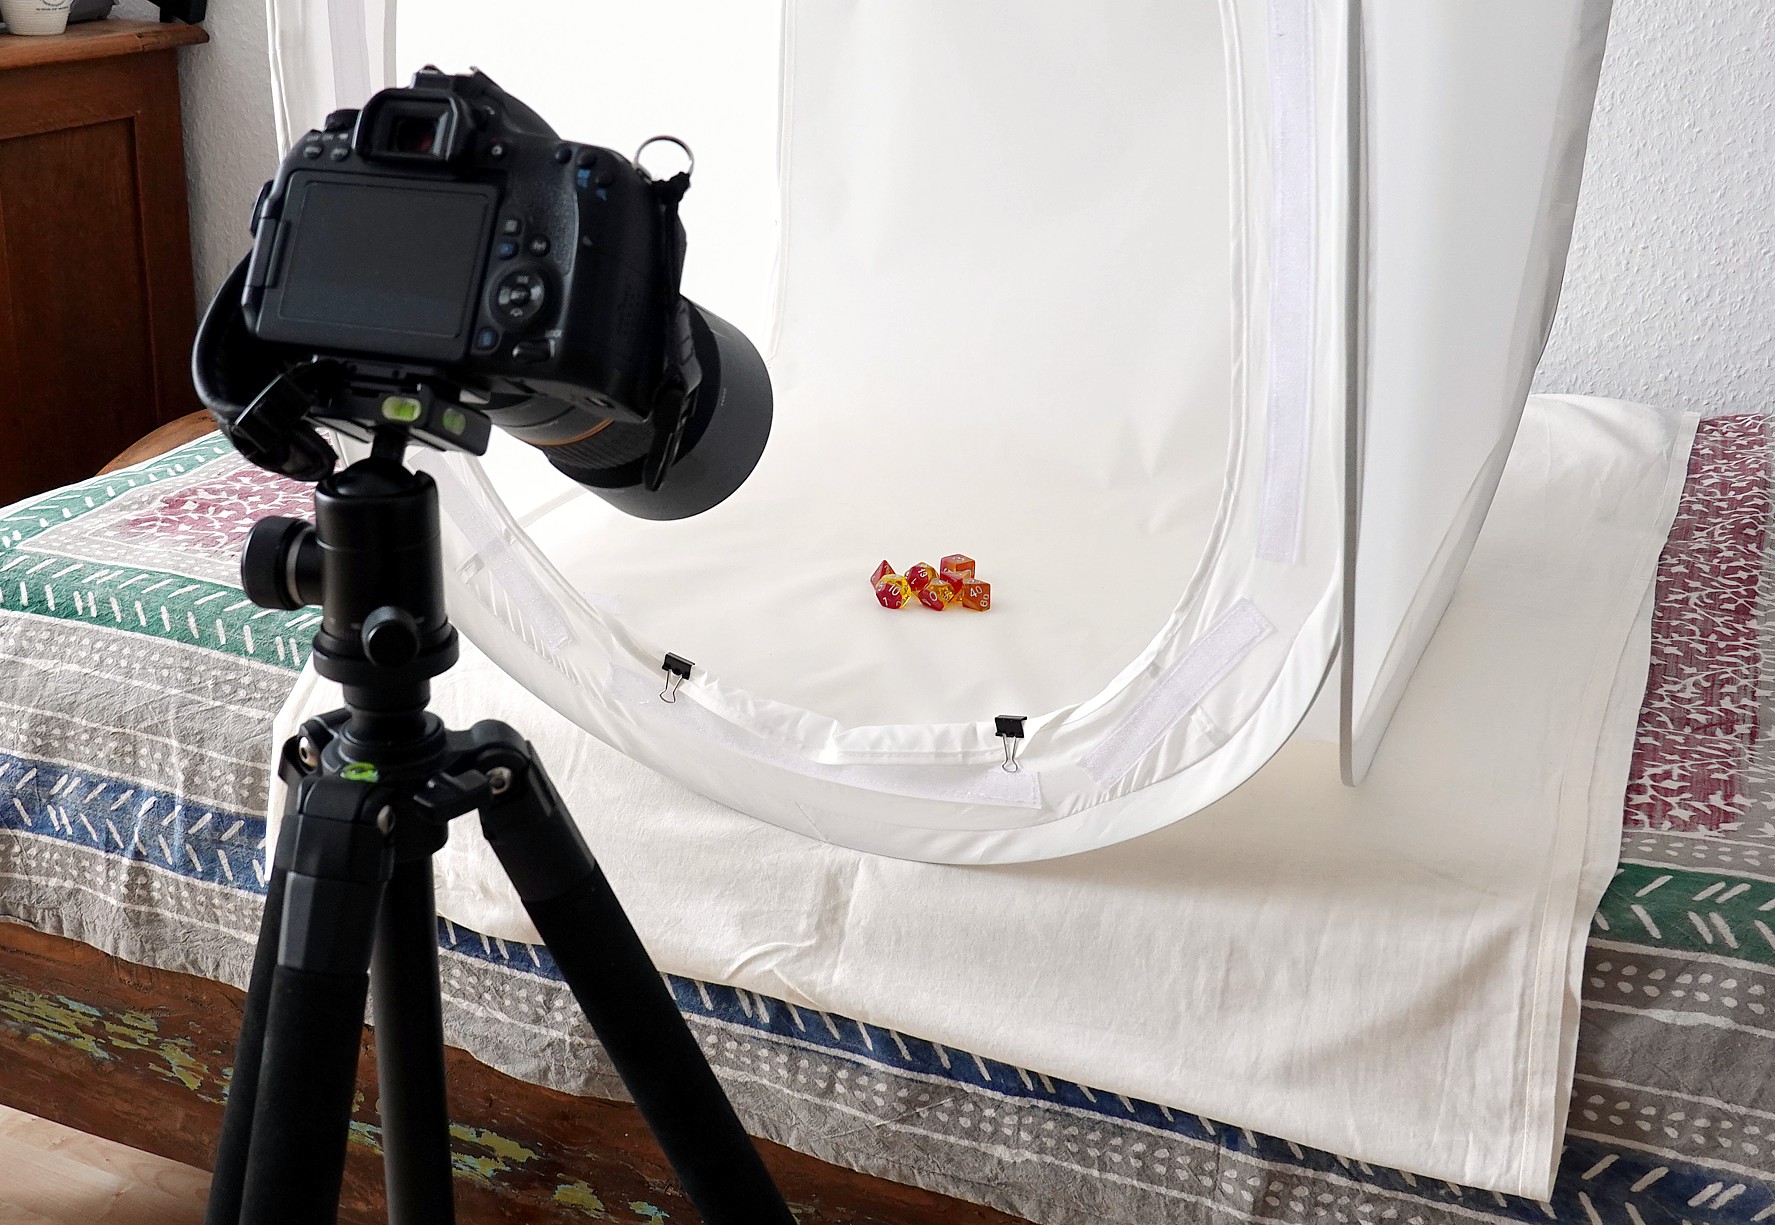
If you’re using a light tent, you’ll need to find the best way for you to set this up in a way that you can get your light sources to be positioned correctly, and the phone or camera on your tripod at the desired angle for your photo. Most people use a table or otherwise plane surface to set the light tent up on and to place the other equipment around.
Your light source is best positioned from above or from either side of the dice, and preferably in a way that there is no glare or harsh reflections on your dice. Diffuser equipment like a softbox or diffuser socks can help, but make sure that your light is suitable to be used with these (heat build-up!).

Set up your camera at the angle of your choice. There is no right or wrong with dice photography. Some people prefer a more frontal view, some from above, or maybe something else entirely. You’re also encouraged to play with different angles or fields of view.
Of course you can also take dice pictures in ambient light or indoor or outdoor daylight. For dice with glitter, for example, artificial light sources don’t always work well, and actual sunlight is preferred for glitter photos. Sometimes the glitter shows best at a certain angle. Try to find the setup and point of view that works best for you.
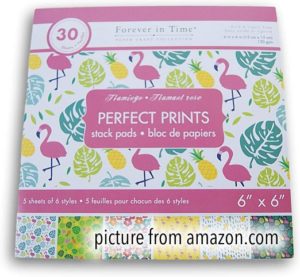
If you have a light tent or light box, they sometimes come with different inlays or backdrops. White is the norm, but you can play around with black or colours. What also works well as background or backdrop is 12×12” scrapbook cardstock paper or gift wrap with patterns or colours. There is no limit to using other accessories as well, such as books, RPG accessories, character sheets, plants, interior décor pieces, candles, ornaments, … Let your imagination run free.
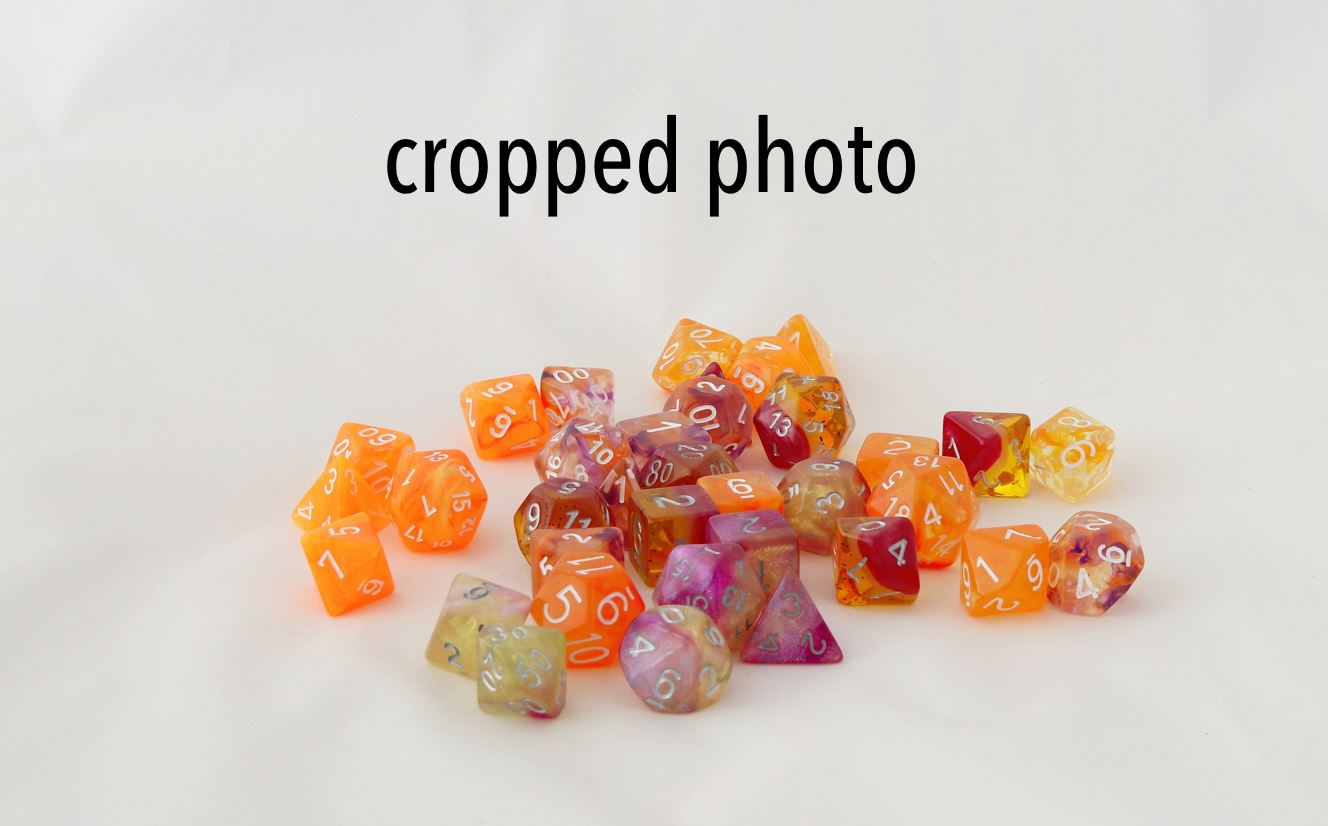
What doesn’t always work well with dice are wide angle shots because (most) dice are rather small. If you don’t have a macro or a tele lens or function, get the closest shot you can with as high image quality setting that you can and then later crop the image to cut out anything in the picture that doesn’t belong there (like the light tent borders, etc.).
You may also consider the aspect of shadows. Using a flash directly pointed at the object from one direction will cast a very visible shadow. If you want less shadowing, you’d have to use a diffuser (like a softbox), which I already mentioned above. If you have an adjustable external flash and a room with a white ceiling that isn’t too high, you can also point the flash at the ceiling and get more ubiquitous, dispersed lighting without distinct shadows.
The Light Box
The intent of a light box is not just to have better or more diffuse lighting. If you’re using a light box and you can see the actual structure of the light box in the photo, you’re not doing it right. Use angles where the light box structures are not visible. If that’s not possible, crop them out later or use cloning functionality in your image editing software to paint or stamp them out of the image.
Most light boxes come with differently coloured backdrops. (If the backdrops are made out of nylon and they are very crinkled or creased, you can try to iron the nylon at low temperatures.) For things like product photos, usually a white or a black background works best. However, colours or patterns can spice up your photos quite a bit.
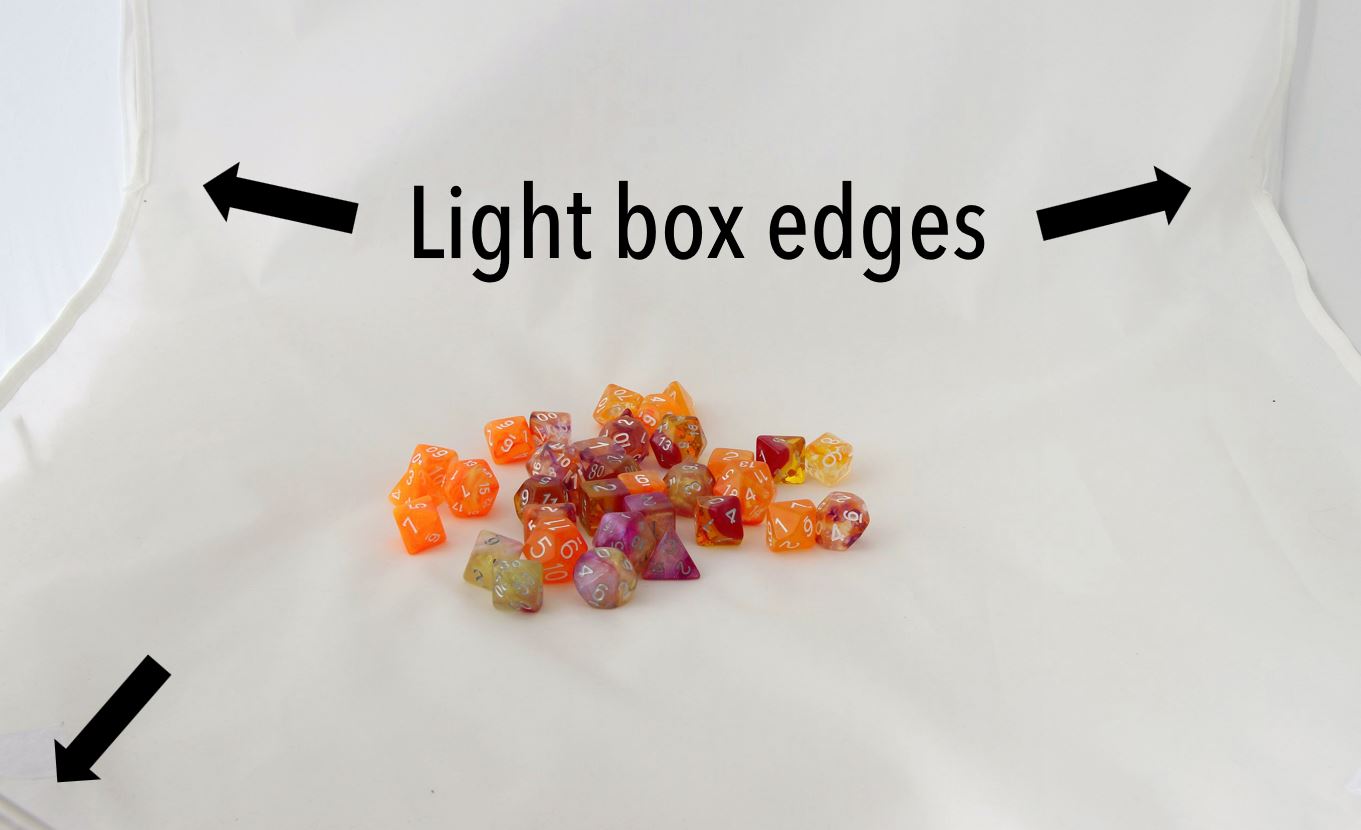
If you’d like to experiment with different backgrounds, there are low-cost options that can work wonders in dice photography, such as scrapbook sheets, gift wrap, foam rubber sheets or other crafting materials that come in sheets or rolls. The trick is to find those that are large enough so that you don’t necessarily see the edges of the light tent in the final photo. If you’re working with sheets, the minimum recommended size is 12 x 12 inches (30 x 30 cm).
Camera Settings
There is no such thing as the perfect setting for a perfect dice photo, as they vary from photo to photo and situation to situation. As a general rule, an ISO setting between 200 and 400 produces good results, but 800 or even 1600 can work in low light environments. It will be hard to get a handheld picture without motion blur at shutter speeds longer than 1/10 of a second, and even that can be challenging. Most regular cameras or lenses won’t let you open the aperture wider than f4.0, wider aperture lenses are often expensive and/or bulky. If you have a tripod or other way to fix your camera into an immobile position, an aperture of f10 or higher is recommended to get a wide enough focus field, but this usually means you need a longer exposure time.
It is also recommended to manually choose which point the camera should use to set the focus to, so that your focus range is where it should be. A lot of cameras have focus field settings where the camera picks the most likely point of focus out of a range it is being offered. To get the best results, choose one specific point of focus manually, rather than automatically have your camera guess one for you.
It might also make sense to take multiple pictures of the same dice with different camera settings or setup. Try different apertures, try different placement of the light(s), modify the camera angle. Play with what you have, sometimes it can create interesting outcomes.

When you use a tripod, it can also help if you set your camera to remote shutter or shutter delay so that you don’t inadvertently create motion blur when you push down on the shutter button. A 2-second delay might be enough, if your camera offers that option. Some cameras can be remotely controlled through wired, infrared, WiFi or Bluetooth remote control functionality (like an actual camera remote control or a smartphone app).
Macro Lens
Is a macro lens or macro adapter necessary for dice photography? The answer would hopefully be no. While a macro lens or adapter will enable you to take close-up shots of your dice that some cameras or lenses won’t let you do, you can crop your photos to get close-up like shots if you use a high enough resolution for your photos.
If you’re interested in looking into macro photography, please note that true macro lenses usually only give you a very narrow focus field, so in order to get a fully sharp picture of the whole object, photographers use a technique called focus stacking, where you take several photos of the same object with slightly different focus fields, and then later use a software to combine them all together to get one completely sharp image. Using that technique is more time consuming in both taking the initial pictures and later editing them. You’d also have to own a camera that supports this technique, because not all of them do.
Image Editing
Back when photos were still shot on film, it was important that you got the perfect shot right out of the camera. Nowadays, with image editing software easily available (some even free), it’s become a bit of a myth that a good photographer has to get the perfect shot without having to take any editing software to the image. Every skilled photographer knows how to make a good shot look better with software.
Nevertheless, image editing software can only be as good as the source material it is given. You cannot produce a perfectly lit photo from a completely over or underexposed shot. Your aim should always be to produce the best possible picture from the camera that you can, and then use software to touch up and tweak where necessary.
As for what software you should use, that choice is very much dependent on personal preference and willingness to pay money for software. Adobe Photoshop is still the industry standard, but is not cheap and now only available as monthly subscription service. However, there are several affordable and even free alternatives that come close in terms of functionality. I cannot give you an exhaustive list, and everyone is encouraged to try what works best for them, but here are some suggestions.
Free: GIMP, Hornil StylePix
Paid: Adobe Photoshop, Adobe Lightroom, Corel PhotoPaint, Corel PaintShop Pro, Affinity Photo, Skylum Luminar, Capture One, ACDSee Photo Studio Ultimate, ON1 Photo RAW, DxO PhotoLab 3
Improving your source material
I could probably write a whole blog entry about image editing, so what are the essentials to focus on? I would start with cropping. Not every picture has the perfect field of view right out of the camera. Cropping can help make an image more interesting, by either cutting away unnecessary background, or by moving the position of the dice in the final photo.
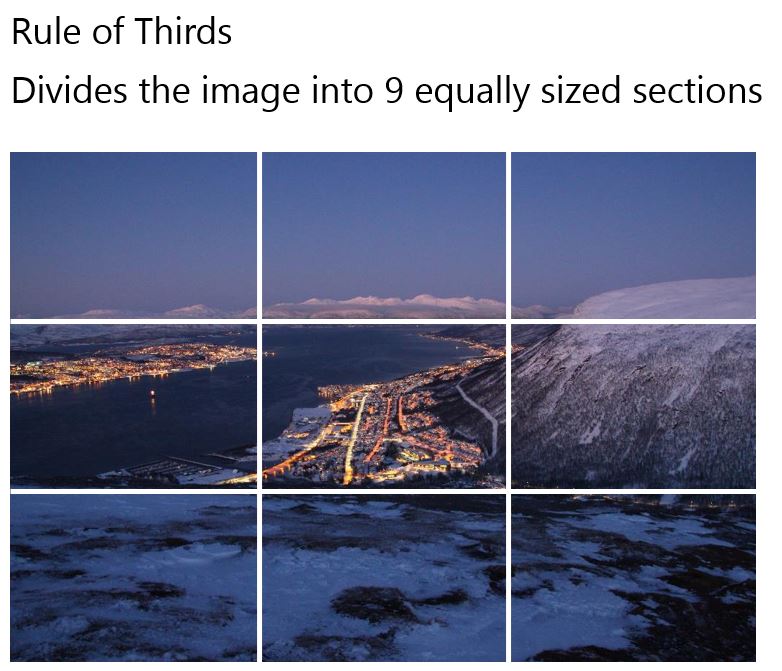
If you’ve never heard of the rule of thirds, take a quick look at this Wikipedia article. In most cases, the rule of thirds is helpful to apply to dice photos as much as it is for other objects. Just remember that a photo usually looks more interesting and eye catching if the object is not placed smack dab in the center of the photo. Even if your source photo was taken with the dice centered, you might be able to use cropping to move them out of the center and a little to the side.
Closely tied to cropping is straightening the image. Any good photo editor has functionality to turn an image or adjust the horizon line. Some also offer lens distortion correction (e.g. if you used a wide angle lens).
Brightness, contrast, colouring, white balance — all things that good photographer adjusts later on if necessary. Simple brightness and contrast sliders can work well, but if your software has this functionality, it might make sense to do better fine tuning via either the Tone Curve functionality or Highlight, Midtone and Shadow adjustment. White balance or light temperature can also be adjusted in most softwares. Saturation increase can help your photo pop, and of course you can also look at predefined filters in whatever software or app you’re using.
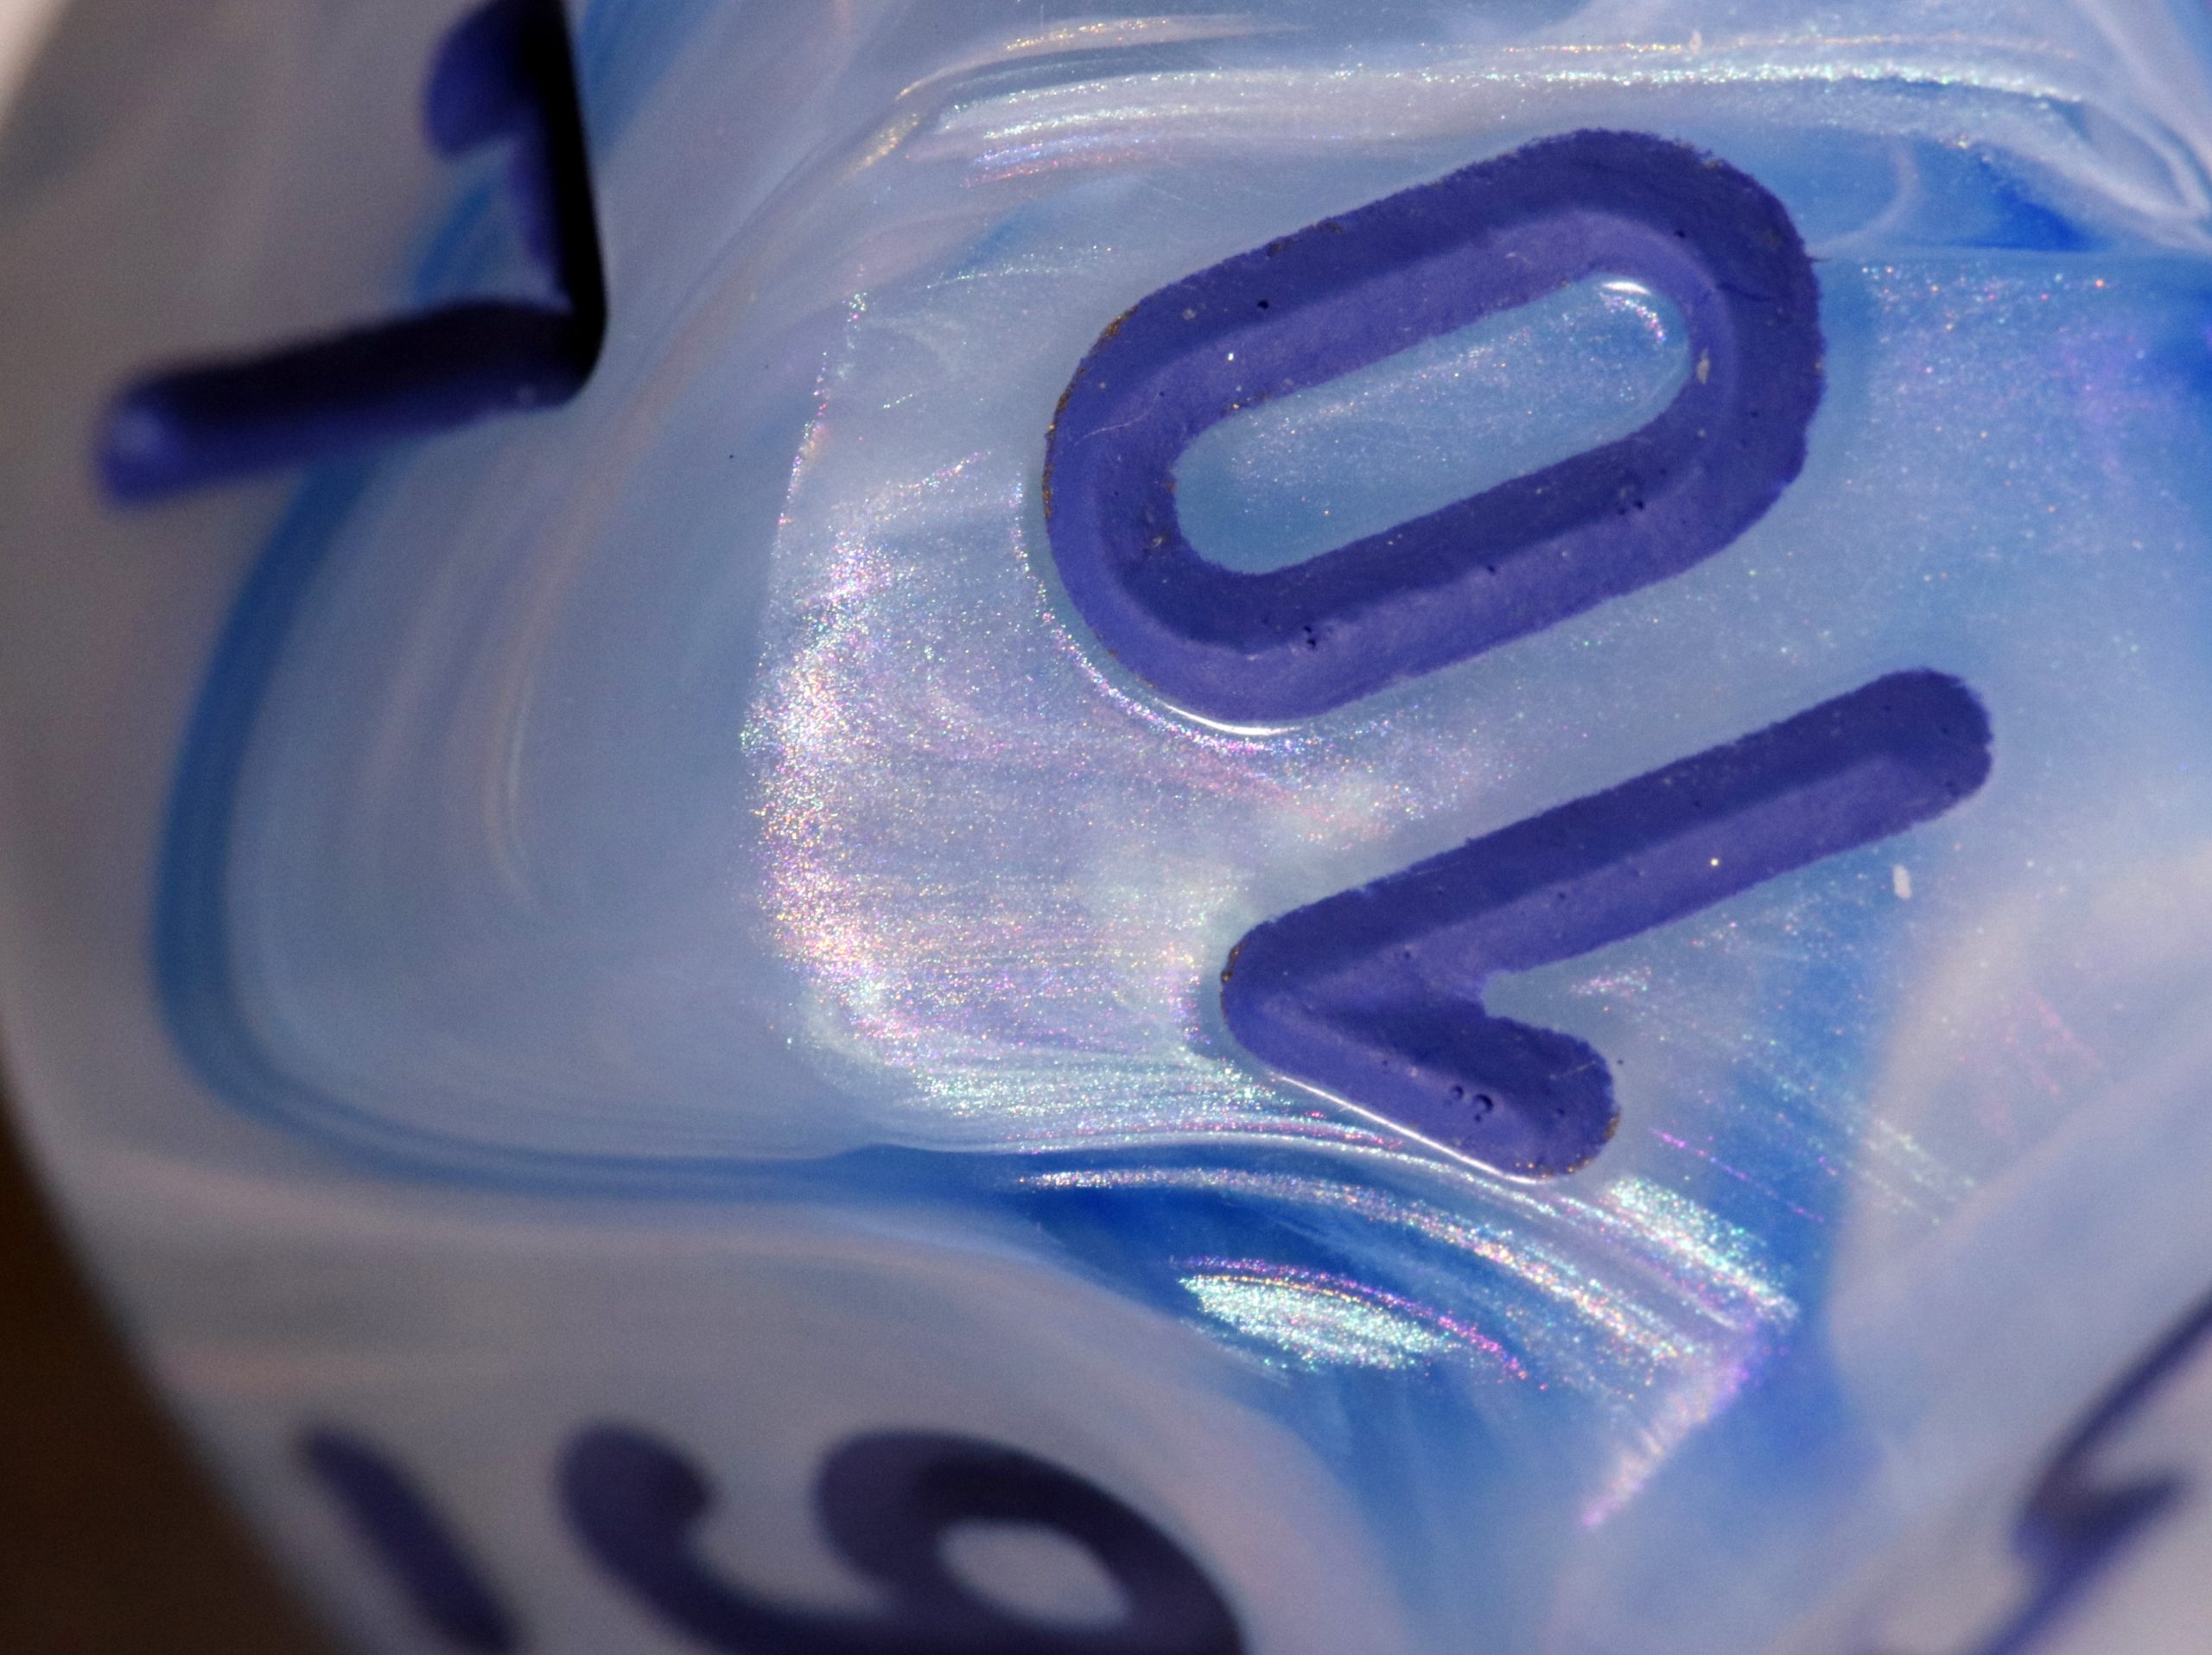
Sharpening might also be an aspect to pay attention to, but no sharpening tool in the world will let you create a perfectly crisp photo with prefect contours when your source material is super blurry. The goal is always to produce a well-focused image, and then later use a sharpening tool to iron out minor focus issues or make certain contours stand out more.
This all sounds really involved, I don’t want all the bells and whistles
And that’s totally okay! You don’t have to become an expert in photography to produce good photos. However, if you’re unhappy with what you think are “potato quality” photos, it will be difficult to move away from that without investing a bit of time in finding out how your camera works or how you can create certain effects not just with your camera, but also with equipment.
If you want to improve your dice photography but don’t want to invest a lot of money, at a minimum you should have a tripod or camera/phone stand, and good lighting. Maybe you don’t even need to buy new lights or a flash. Maybe you just need to find the one good spot in your apartment or flat that is well lit and accessible. Maybe you can make use of lamps or lights you already have. There’s plenty of articles on the internet to peruse if you google terms like “photography on a budget”.
And last but not least, always edit your photos. Cropping can do wonders. Brightness and contrast enhancement are always useful and can improve your images greatly. Spending the extra five minutes can make it worth it and elevate a nice shot to a great shot.
What can I do if I just want to work with what I have?
If you’d like to stick with your smartphone or compact camera and don’t want to invest in equipment, that’s perfectly fine. Good advice is always to try and find a way to light your photos as best as you can, and to ensure that your focus is set on the die and not the background around it. Take ten minutes to check your phone or camera manual how to manually set the focus in your picture to a desired object, it will help you not just for dice photography.
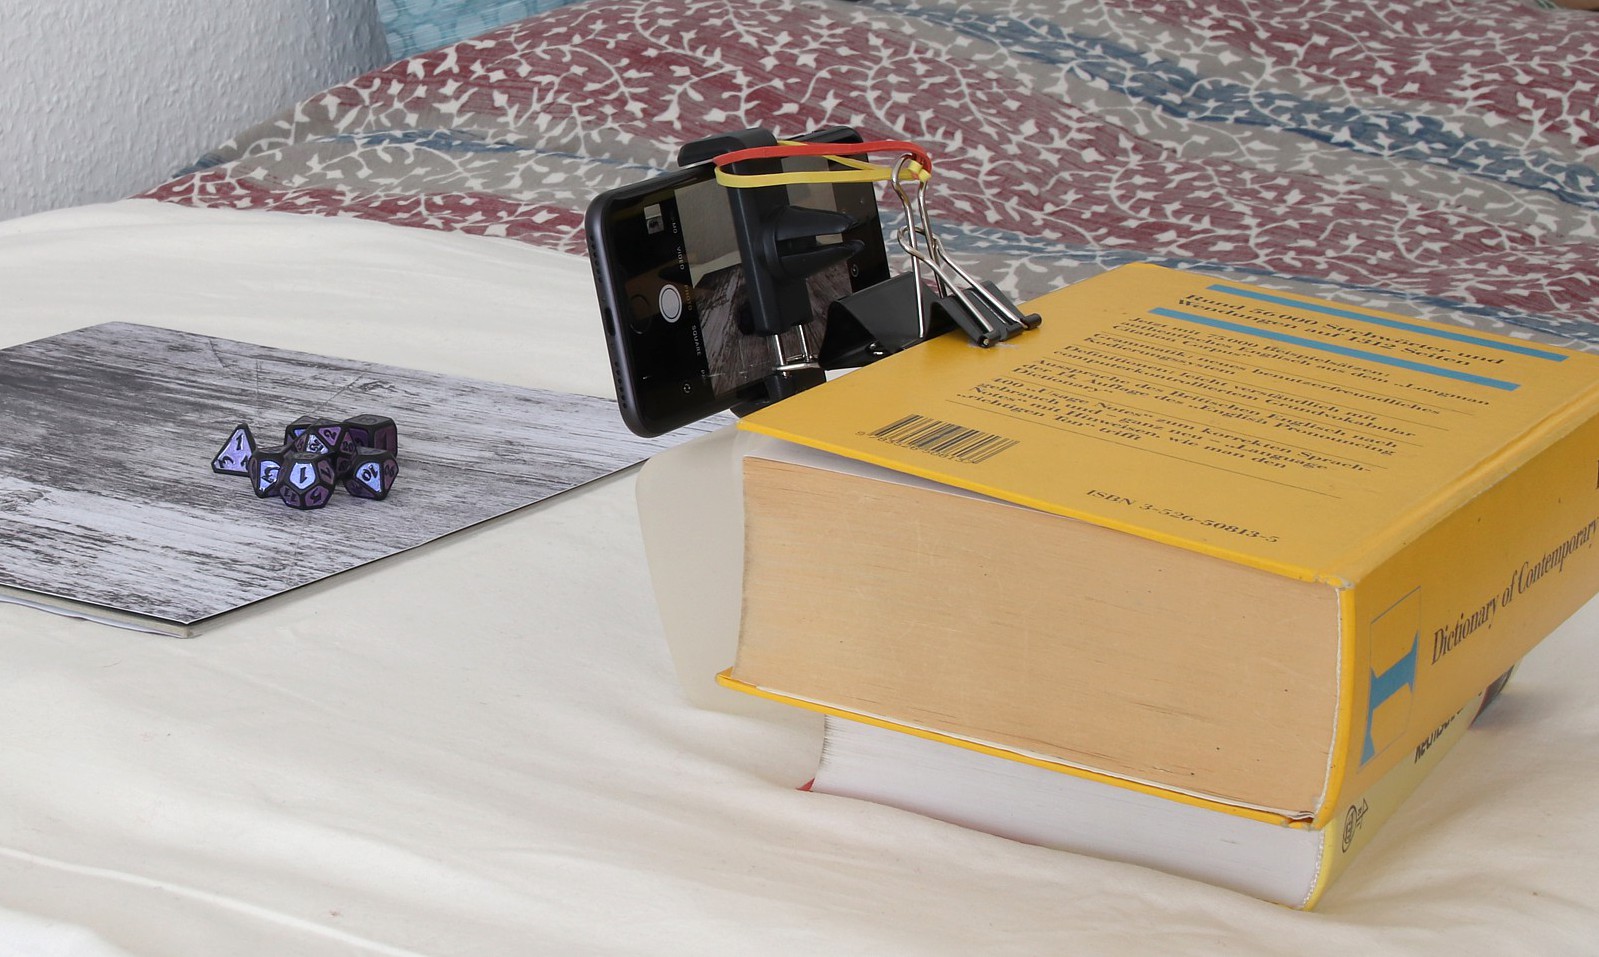
Try to find a way to immobilize your device to avoid motion blur, especially in low light situations; if it’s not a tripod then find something that you can Scotch tape to, put on or lean your device against. Or maybe even get creative to put together a DIY smartphone holder—there’s some great ideas is this article. Perhaps look into whether your device has a shutter delay function (like a self-timer), that can help avoid motion blur especially for smartphones where you have to tap the screen when you take a picture.
Play around with the editing functionality of your smartphone or find a free software or app that lets you do basic image editing like brightness and contrast settings. A little of that can go a long way.
In summary

You absolutely don’t need top notch equipment to take good photos. Better equipment can help you take your photography to the next level, but there’s a few simple principles you can employ with any camera, even just a smartphone:
- Good light is absolutely important. Dark or murky surroundings tend to either make your photos grainy or motion-blurry. Try to use whatever light sources you can work with—be it sunlight, a camping light, desk lamp or even a flashlight.
- Invest 15 or 30 minutes of your time to learn the basic functions of your camera, especially how you can set the focus to the one point in your picture that you want be sharp.
- If your camera doesn’t have macro capabilities, increase the resolution (= quality setting) of your pictures, take a wider angle photo (= from further away) and then crop out what you don’t need. Cropping is your friend!
- If you want a bit more, invest half an hour (or more) in finding a tutorial or blog that explains the basics of photography (i.e. aperture, shutter speed, ISO) and move away from using your camera’s ‘fully automatic’ mode. Taking pictures with manually chosen aperture, shutter speed and/or ISO can work wonders. And maybe also look up the rule of thirds.
- It’s not ideal to shoot dice handheld. If you don’t have a tripod, try to make a stand of some kind that you can place your phone or camera on (e.g. out of books or boxes) and use a timer to take the picture (or a remote or a camera connection app that lets you shoot remotely).
- If you do want to invest a little bit of money, first consider a tripod or phone holder. If you want more, maybe a light tent or lightbox. If you use a light tent, please note: Cropping is your friend. 🙂
- Get creative with backgrounds. Scrapbook paper or gift wrap can be awesome tools. Get creative with angles and field of view, as much as your camera will let you. Don’t be afraid to try out new things.
- Last but not least: Always edit your images. You might be surprised how much of a difference even just a bit of contrast and brightness enhancement can make.
I hope this has helped you get inspired to take dice photos, and I’m looking forward to seeing more great dice pictures on social media!
Photos © by Tina Manneborn unless otherwise credited. Reuse or modification without permission not allowed.